TestCafé Integration with Azure DevOps
By Kavindra Lunuwilage
The necessity of doing End to End Testing is getting more powerful each day. Development speed is evolving and the right way to keep riding that speed boost wave is to utilize End to End Testing for your applications. TestCafé is a Node.js tool for automated End to End Web Testing. It is free and open-source, easy to set up and it is working on all popular environments.
Why TestCafé for End to End Testing?
Like Cypress, TestCafé scripts can be written in Javascript and Javascript is one of the languages that most IT professionals are familiar.
TestCafé provides great browser support and works in all popular environments. Internet Explorer 11 is a browser that is deprecated in 2020. But some high-security system applications and machines eg: banking systems use old operating systems, due to security reason third party applications cannot be installed. To perform an End to End Testing in such environment browser supportability is a must.
TestCafé provides mobile browser test execution for Google Chrome and Safari. TestCafé has this transferring test execution to your mobile devices by simply scanning a QR code.
TestCafé Architecture
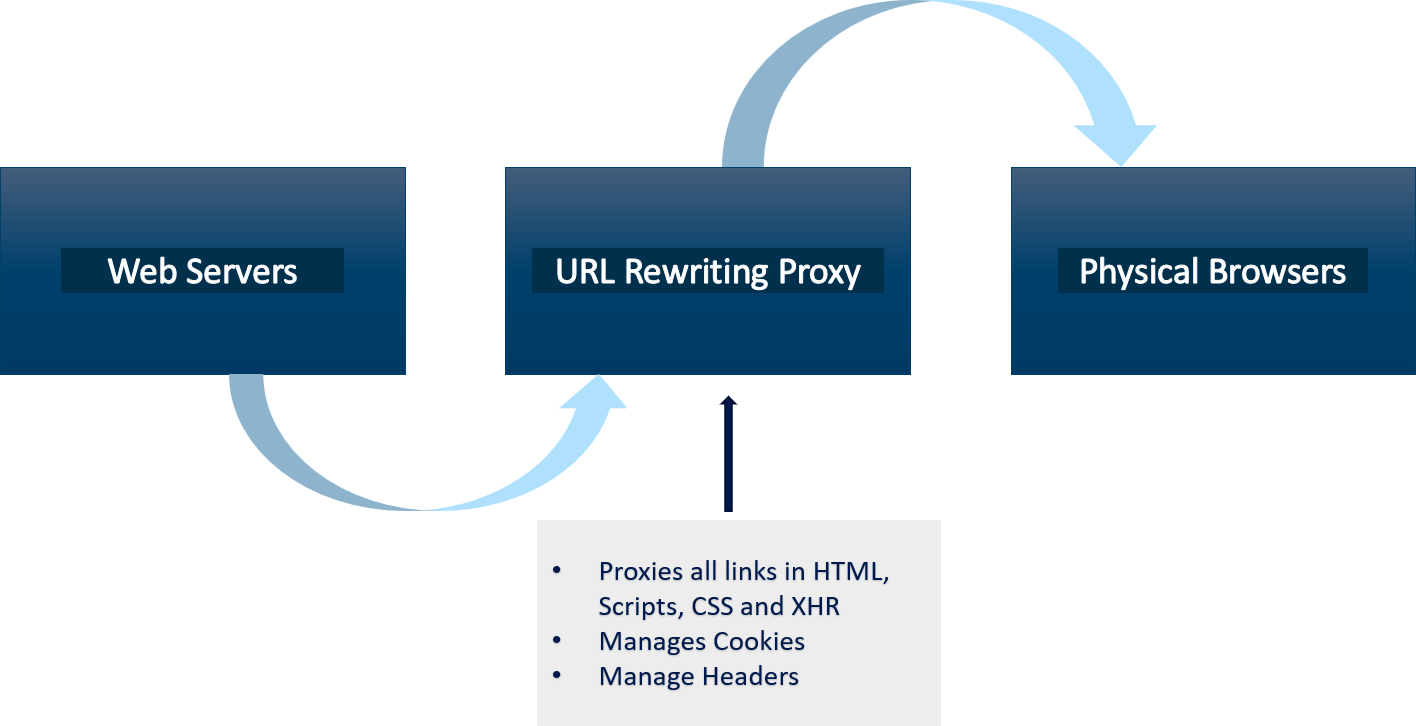
TestCafé runs the test code written by the user in Node.js environment on the server-side. Scripts that emulate user activity run inside the tested page (client-side) in the browser on the same or different device.
This architecture is a hybrid approach which combines browser scripts and standalone server-side code. Here the browser scripts consist of built-in waitings, XHR testing, mobile testing etc.
TestCafé Features
- Inbuilt User Role mechanism to handle authentication
- Inbuilt Assertion Library
- Intelligently handles asynchronous functionality in timeouts or waits.
- Inbuilt Report Functionality
- Data-Driven testing can be performed using JSON, XML, CSV and Excel files
- Inbuilt Browser drivers to support all browsers including IE
- Inbuilt Debugging Mode
- Tests can run in Mobile Browsers
Installation Steps
Installing TestCafé is a very simple task. As a prerequisite, node.js should be installed in the machine. First, create the package.json file inside your folder. Then use the following npm command.
$ npm install testcafe
TestCafé Framework
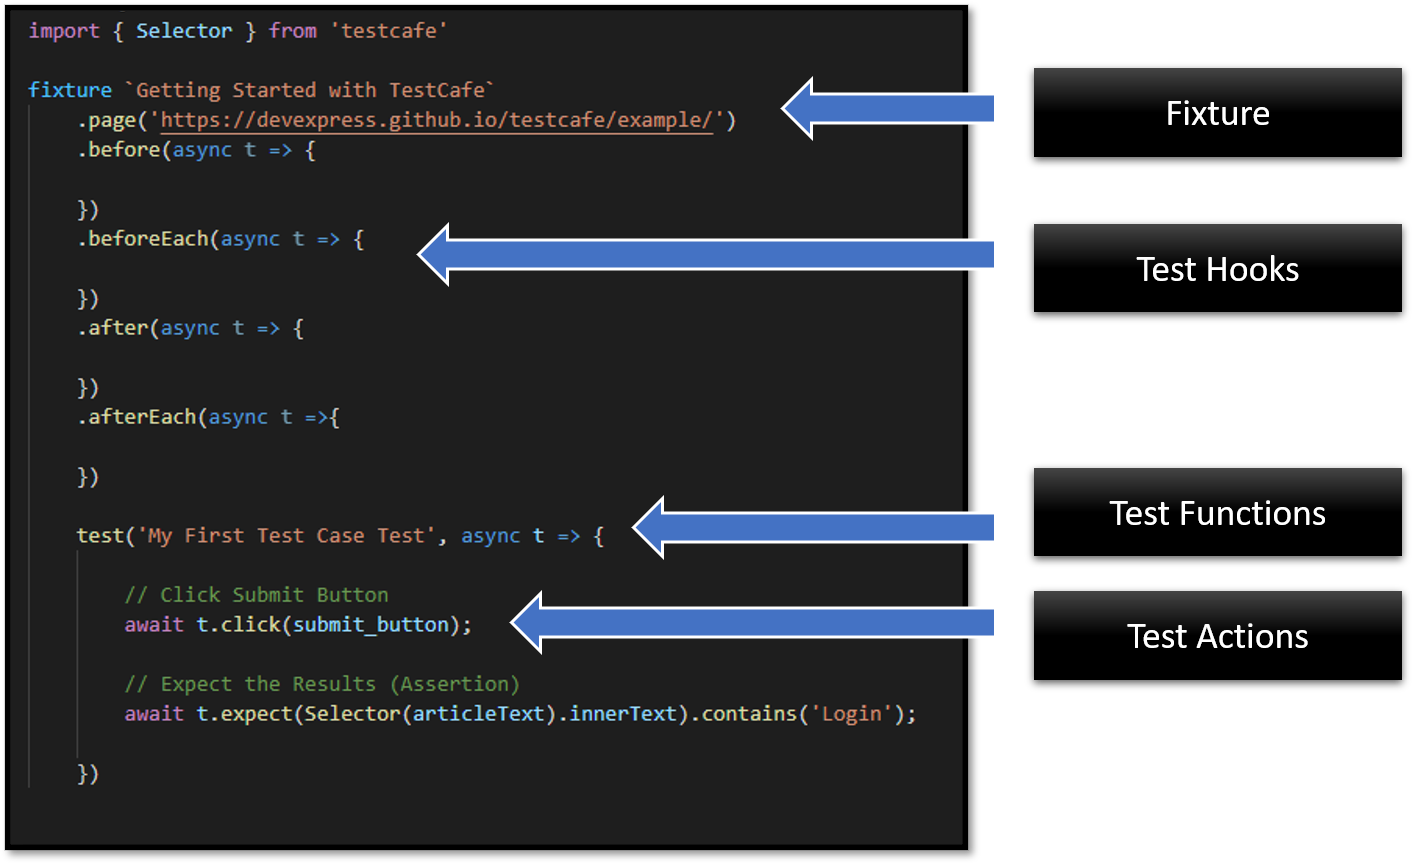
Once the installation is completed, open the project folder in the Visual Studio Code or any other Javascript supported IDE. To write TestCafé scripts, the above framework structure can be used. The advantage of using a structured framework is to get the highest benefit of the Page Object Model.
- Fixtures — Consider as the parent of a group of test & sits at the top of every file
- Test Hooks — Actions to perform at the start and end of the test scenario
- Test Function — A set of instructions provided to perform on the system under test. Test controller object is declared when test function is created.
- Test Action — An action performed by identifying a web element state
TestCafé Selectors
To observe Page States and Elements, TestCafé provides “Selector” method. If the result of the Selector is not an induvial node, then TestCafé provides helper methods to further search and filter.
To capture element states, inside the test scripts first need to import the Selector from TestCafé library.
import { Selector} from ‘testcafe’;
Like cypress, identifying elements are easy with TestCafé. CSS Selectors are more reliable and stable to use in TestCafé.
Sample TestCafé Script
After importing Selector to the TestCafé test file, let’s write a simple TestCafé script for a Login Function.
import { Selector } from 'testcafe'

// Definition of Test Suite
fixture`Getting Started with TestCafe`
    .page('addURL')
    .beforeEach(async t => {
        // Setting the Test Speed
        await t.setTestSpeed(1);

        // Set Page Load Timeout
        await t.setPageLoadTimeout(0);

        // Maximize the Window
        await t.maximizeWindow();
    })

    // Testcase to fill the name in input and click submit
    test('Login to Portal', async t => {

    // Selector (Can use in a seperate file as well)
    const username_input = Selector("input[name='username']");
    const password_input = Selector("input[name='password']");
    const login_button = Selector("button[type='submit']");

    // Enter Username
    var username = "addUserEmail";
    await t.typeText(username_input, username);

    // Enter Password
    var password = "addPassword";
    await t.typeText(password_input, password);

    // Wait Test for Few Seconds
    await t.wait(3000);

    // Click Submit Button
    await t.click(login_button);

    // Expect the Results (Assertion)
    await t.expect(Selector(".nav-link.px-3.dropdown-toggle").innerText).contains('Dashboard');
})
Run TestCafé Script
Running TestCafé in the command line is easy. Just give the following command with your file name and relevant browser you need to run the tests.
$ testcafe chrome ./tests/my-fixture.js
Apart from the above command, there is another method to run the scripts by specifying the command in the package.json file.
$ “test:Login”: “testcafe firefox ./tests/login.test.js”
Inside scripts section copy and paste the above command and customize according to your requirements. Then easily run the script in the command line using the following command.
$ npm run test:Login
To generate a test report with the test results, there are plugins available and TestCafé ships with the following reporters.
- spec
- list
- minimal
- xUnit
- JSON
For this tutorial, xUnit is used as the reporter plugin. To run the tests in CI/CD pipeline headless mode is used. By the running following command, we can create a report with test results in headless browser mode.
$ testcafe firefox:headless ‘path/to/test/file.js’ — — reporter xunit
Integration with Azure DevOps
By following the above steps carefully, TestCafé scripts can be run in the local environment. But once the scripting is done, testers need to push the scripts and integrate them with CI/CD pipelines.
So let’s integrate TestCafé with Azure DevOps CI/CD pipeline from there onward.
Step 1-
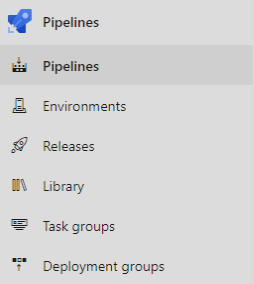
Login to Azure DevOps portal and create a Repo for your project. Then click on Pipelines section to create a new CI/CD pipeline.
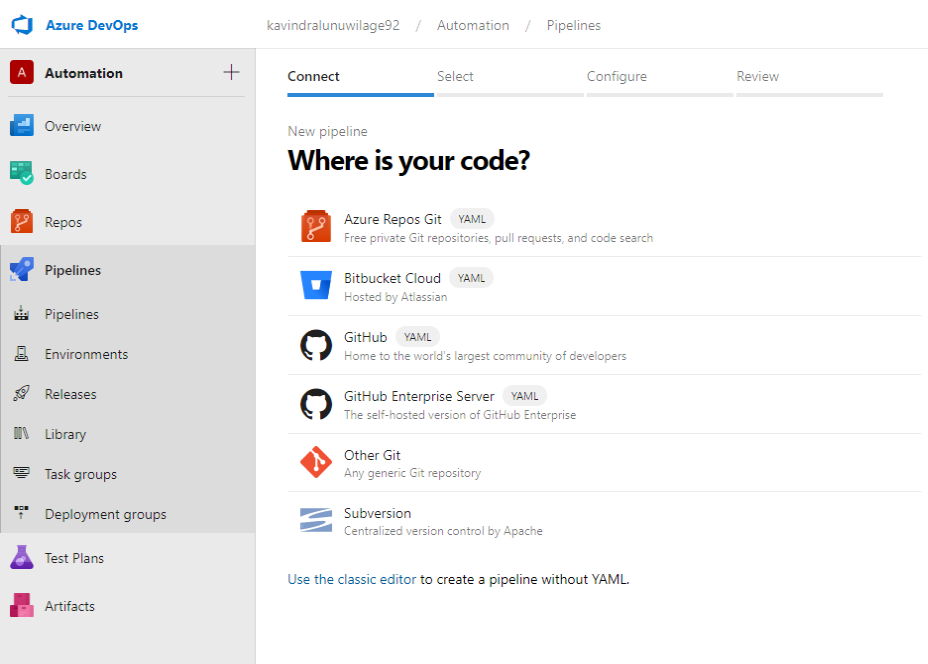
Step 2-
Click on Create New Pipeline and following window will load. Then select the Repo where your code is. For this tutorial, Azure Repos are used. Select the Azure Repos Git from the list.
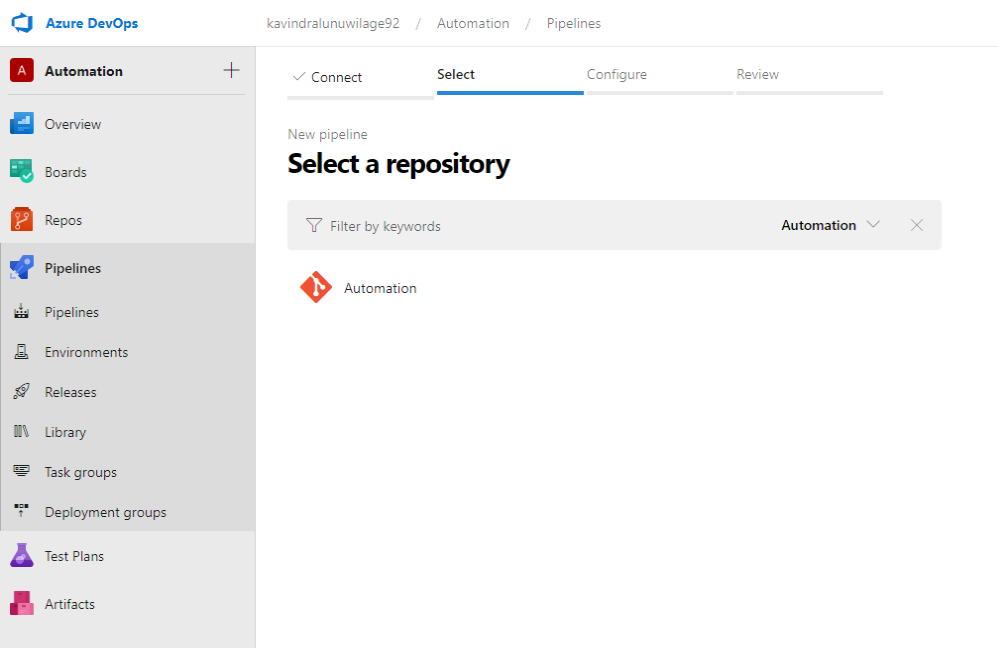
Step 3-
Now select the repository for your new pipeline.
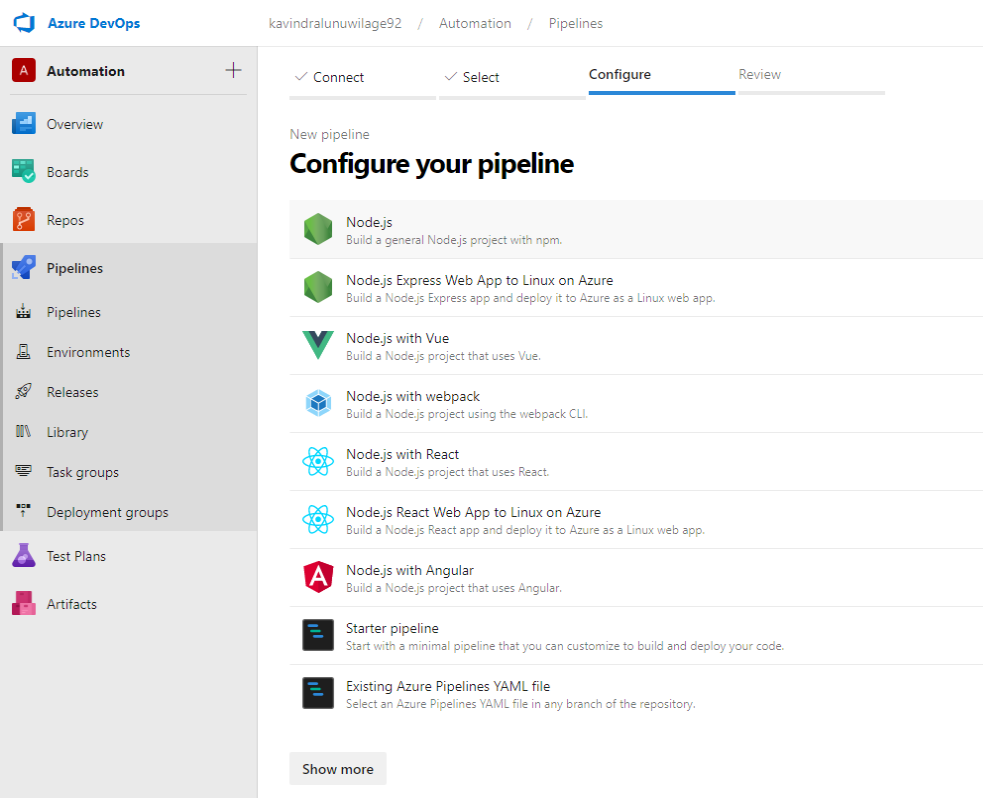
Step 4-
After selecting the repository, the user will be navigated to the configure section. This tutorial is about creating a node.js project for TestCafé. Let’s select Node.js project.
Step 5-
After completing the Configure section, it will be redirected to the Review sections. Here you have to create the azure-pipelines.yml file. Be careful and mindful when creating this file. Because all your efforts will go in vain unless you do this part carefully.
By default, you will get the following yml file with preset of configurations.
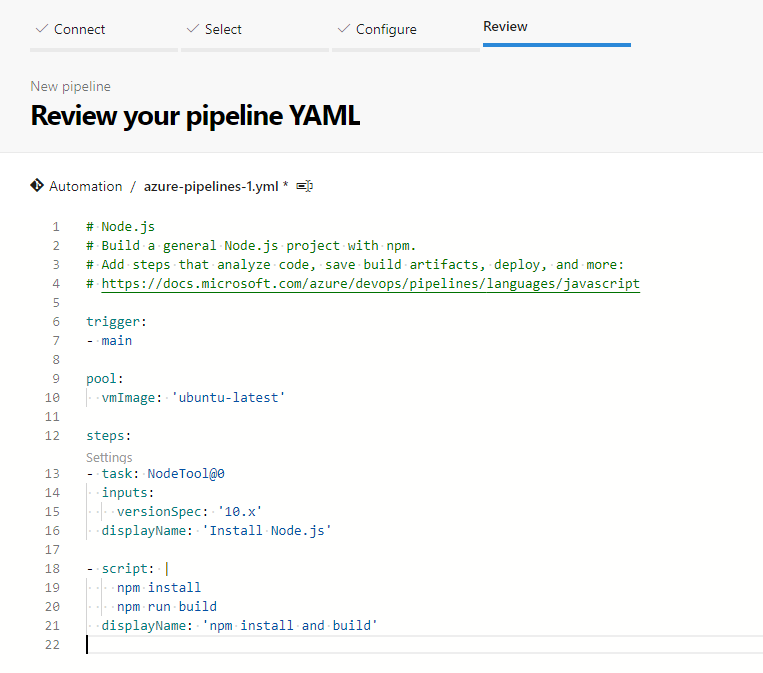
Let’s configure this yml file to cater to our requirements.
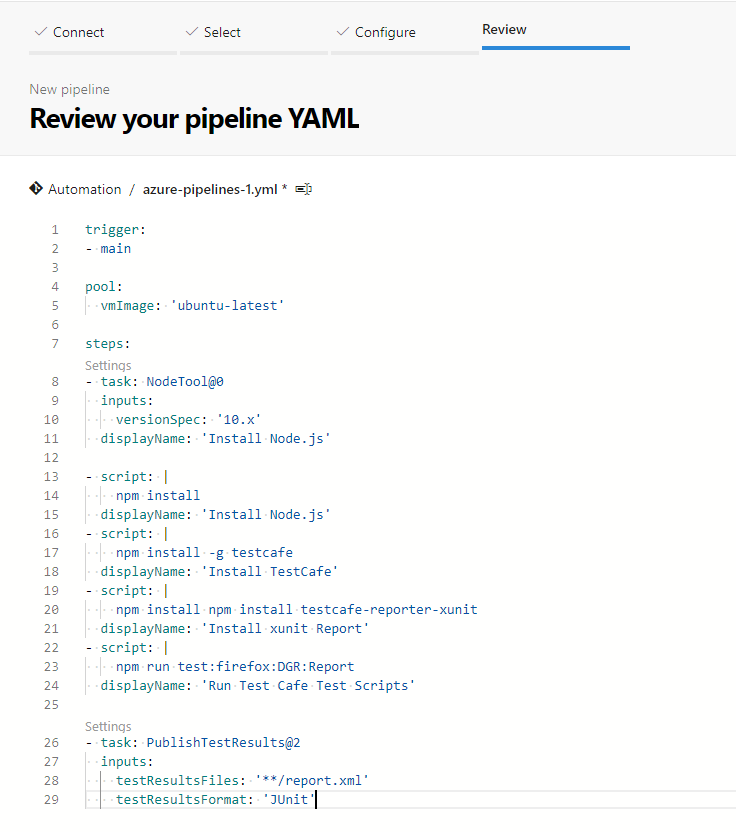
Inside the Scripts section, installing node.js to running TestCafé file steps should be included as above. Once script section is finished add the test report file configuration inside the Settings section.
Step 6-
Now click Save and Run. Then it will automatically start running the task and after that publishing the results.
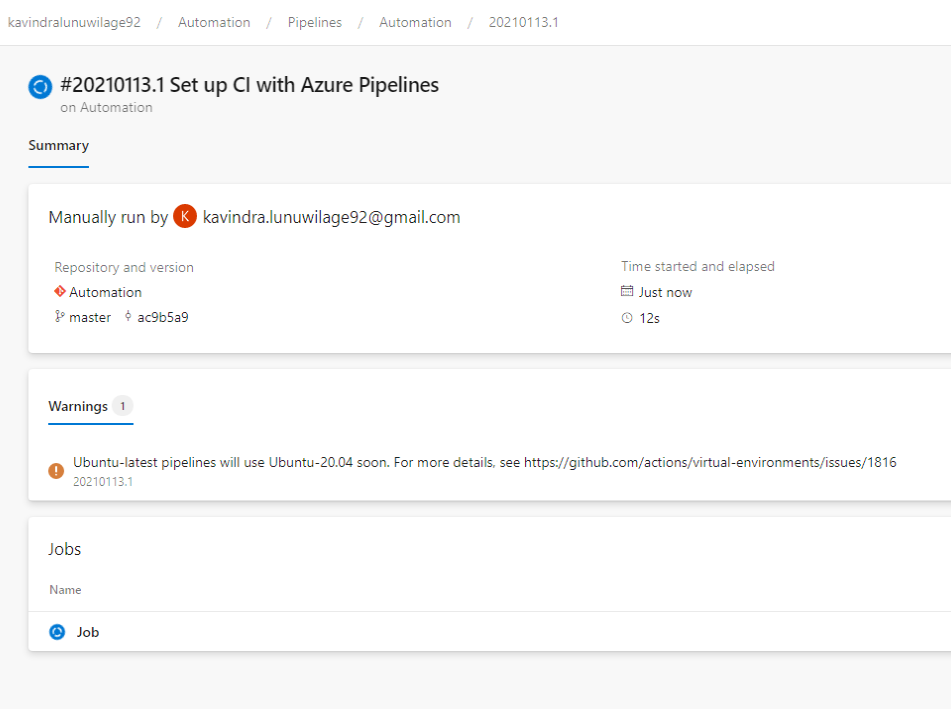
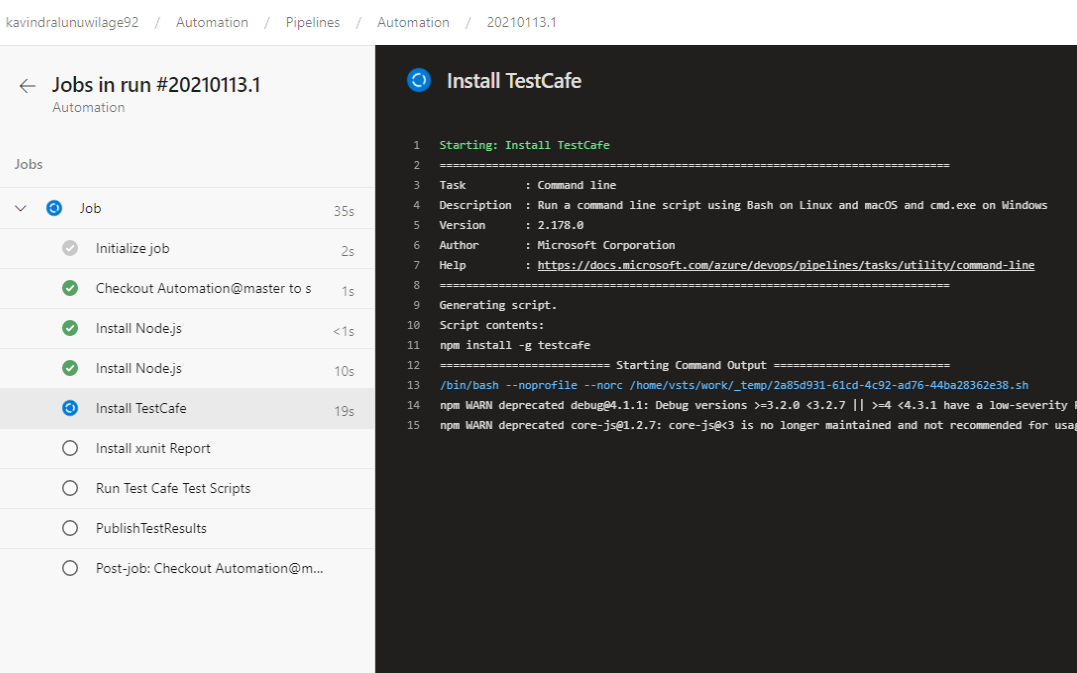
Now to view your steps that created inside the yml file, click on the running job icon to navigate inside.
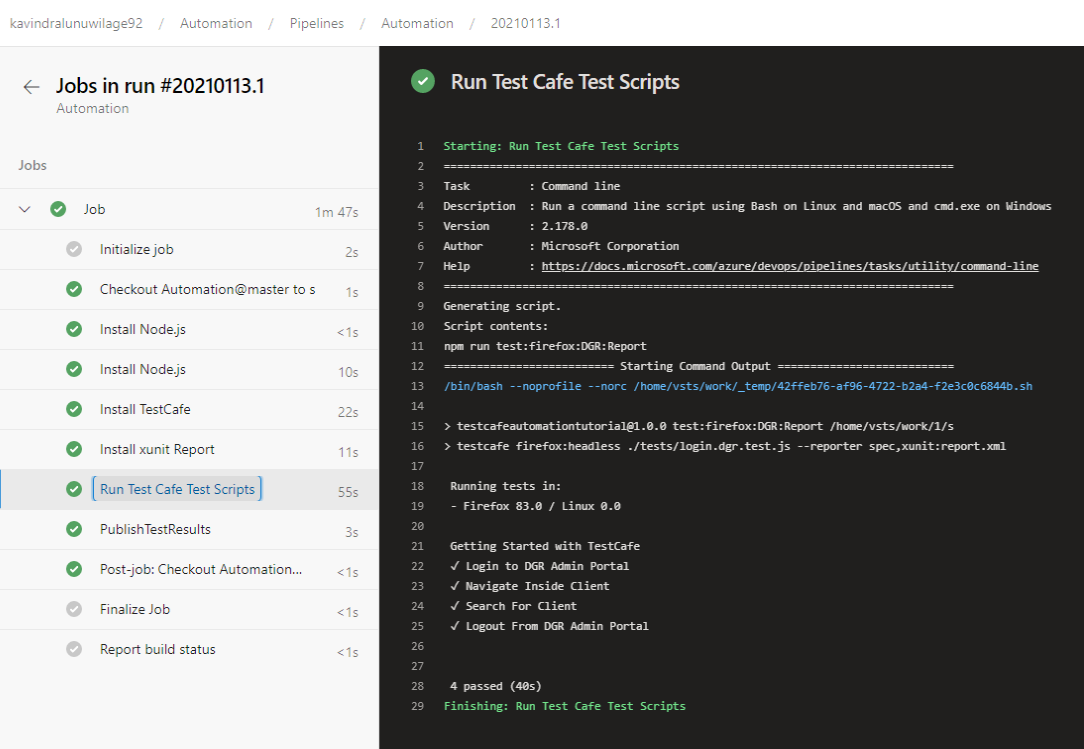
Once the test script finishes running, the following output will be displayed with the Test Results in the console. The test script was run in the headless mode.
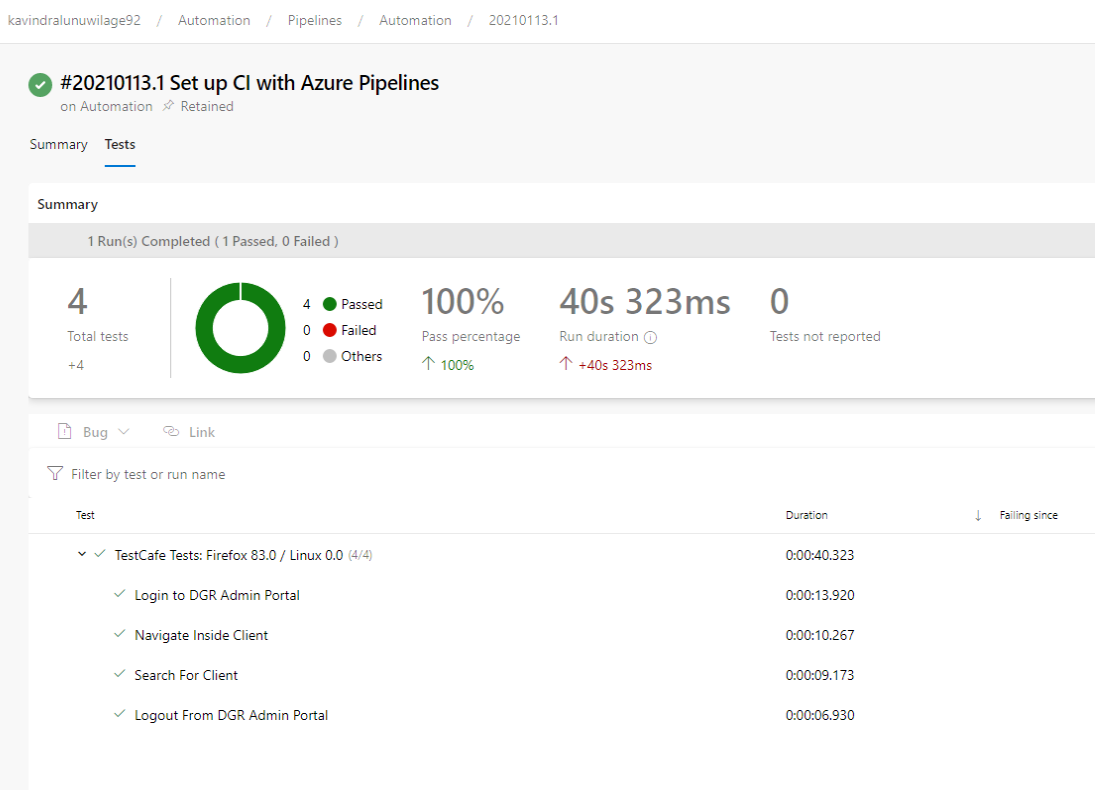
Step 7-
Now it’s the time to view Test Results. This can be done by navigating inside the pipeline and selecting the relevant build.
Conclusion
Until now the experience of using TestCafé looks really great. With all in-built features and user-friendliness make TestCafé a winning automation framework against all most all the tools available in the industry.
TestCafé does not have direct support to use XPaths to define selectors. But CSS Selectors are way more enough to work with this tool. In upcoming months and years let’s wait and see how stable TestCafé when running larger test suites. Integration with Azure DevOps CI/CD pipeline is very straight forward and less hassle.
TestCafé is a good alternative for Selenium and Cypress. Even feature-wise TestCafé is similar to Cypress Framework, there are more reliable in-built features than Cypress.
Happy Testing!
Stay Safe!!!