React State Management with Redux Toolkit
By Akhila AbesingheReact is a JavaScript library that can be used to build user interfaces. React is one of the most popular solutions when it comes to web frontend development. Many people admire the simplicity and flexibility of React. With compared to other popular frameworks like Angular and Vue, React is not a fully functional framework. It’s more likely a library which the main purpose is to build user interfaces. Therefore, to take the full advantage of React, we need to use other third-party libraries to build more complex web applications using react. Redux is one of the libraries that can be used to state management in react applications.
Redux is an opensource library that can be used to centralize and manage application state. It was created by Dan Abramov and Andrew Clark. Redux works on very basic and simple principles that everyone can understand. But when the application gets more and more complicated, there are unnecessary amount of code is added to the application by Redux. The complexity of configuring a redux store and the amount of boilerplate code that required to run redux was two major disappointments that the Redux users had.
Redux toolkit was introduced to get rid of above-mentioned downsides of Redux.
Installing Redux Toolkit
For a new application
# Redux + Plain JS template
npx create-react-app my-app --template redux
For existing application
npm install @reduxjs/toolkit
Create a Redux store
Store is the place where all the application states will be. There can be multiple stores in more complex applications. But in our example, we create a single store. Following steps automatically configures Redux DevTools that can be helpful while developing.
import { configureStore } from "@reduxjs/toolkit";
import counterReducer from "./counter";

export default configureStore({
  reducer: {
    counter: counterReducer
  }
});
Create a Redux State Slice
Previously in regular Redux, State, Actions and Reducers are implemented separately. But in Redux Toolkit, “createSlice” is introduced and it holds the state, Redux Actions and Reducer functions for the whole slice in the same location. This is cleaner and easier to use. In the following code snippet, Inside the ”createSlice” method, the slice is named as “counter”. This helps to identify the slice between multiple stores and multiple reducers. After that the initial state is defined with the default values of state variables. Then there is an object called reducers. This contains everything that touches the state, like Actions and reducers that modifies the state.
Below the first two actions will increment and decrement the value of the count variable. But in the third action, the value of the count variable will be increased by the amount that passed into that action. Finally, it exports all the actions and the reducer itself.
import { createSlice } from "@reduxjs/toolkit";

export const counterSlice = createSlice({
  name: "counter",
  initialState: {
    count: 0
  },
  reducers: {
    increment: (state) => {
      state.count += 1;
    },
    decrement: (state) => {
      state.count -= 1;
    },
    incrementByAmount: (state, action) => {
      state.count += action.payload;
    }
  }
});

// Action creators are generated for each case reducer function
export const { increment, decrement, incrementByAmount } = counterSlice.actions;

export default counterSlice.reducer;
Provide the Redux Store to Application
Here in the index.html file, we provide the created store to the application. Here we wrap the
import React from "react";
import { useDispatch, useSelector } from "react-redux";
import { decrement, increment, incrementByAmount } from "./redux/counter";
import "./styles.css";

export default function App() {
  const { count } = useSelector((state) => state.counter);
  const dispatch = useDispatch();
  return (
    <div className="App">
      <h1> The count is: {count}</h1>
      <button onClick={() => dispatch(increment())}>increment</button>
      <button onClick={() => dispatch(decrement())}>decrement</button>
      <button onClick={() => dispatch(incrementByAmount(33))}>
        Increment by 33
      </button>
    </div>
  );
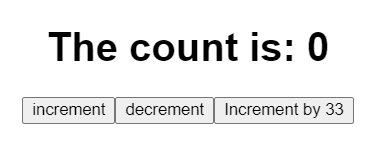
Use Redux State and Actions in React Components
Now the final step, to use the Actions and Redux state variables in application. Here we use “useDispatch” hook. By using this, all the actions in all the slices are accessible in anywhere in the application.
import React from "react";
import { useDispatch, useSelector } from "react-redux";
import { decrement, increment, incrementByAmount } from "./redux/counter";
import "./styles.css";

export default function App() {
  const { count } = useSelector((state) => state.counter);
  const dispatch = useDispatch();
  return (
    <div className="App">
      <h1> The count is: {count}</h1>
      <button onClick={() => dispatch(increment())}>increment</button>
      <button onClick={() => dispatch(decrement())}>decrement</button>
      <button onClick={() => dispatch(incrementByAmount(33))}>
        Increment by 33
      </button>
    </div>
  );
}
This is all we need to configure Redux Toolkit inside a react application.