Integrating Azure AD SSO
By Chalith DesamanFrom this blog post we will be discussing how to integrate Azure AD SSO with your .Net core application. And then we will see how to Integrate Graph API and access AD user from the application. Here I’ll be guiding you step by step with the code samples. But before that let’s get brief idea about terms we are going to use.
What is SSO ?
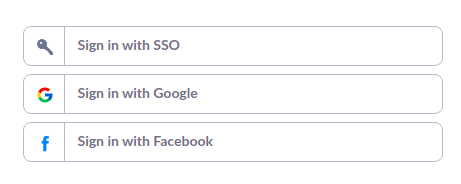
Have you ever login to a website with your Gmail or Facebook account. If yes with or without intention you have used a SSO(Single Sign On) service. Which means Google or Facebook whichever is a provider who provides Single Sign On service. So some third party applications integrate this service and allow Gmail or Facebook users to access their application. So Azure also has a SSO service. So we can integrate Azure SSO service with our application and provide ability to access Microsoft users to access our application. Which we will be disusing within this blog post.
What is Azure AD ?
AD(Active Directory) is the Microsoft’s cloud based identity service. Organizations can setup their own Active Directory and register users with their Microsoft logins. So the registered users can be given various permissions within the organization. Users can be assigned to the user groups and those groups can be used as permission groups to give group level access. Active Directory users and groups can be viewed in the Azure Portals Active Directory.

What is Graph API ?
Graph API is the API which can be used to access the Azure Active Directory from outside of Azure Portal. We need to integrate Graph API to list users or groups within the Active Directory.
Okay! Let’s move on to the step by step guidance.
Now we’ll see how to use Azure AD SSO within our application
First you need to setup a App Registration for your Application
We need to register our application with our Active Directory which we are going to give Active Directory access for. We’ll discuss how to do the app registration in the following steps.
- Go to Azure Active Directory from azure portal side panel, then click App registrations and click New registration to register the application

-
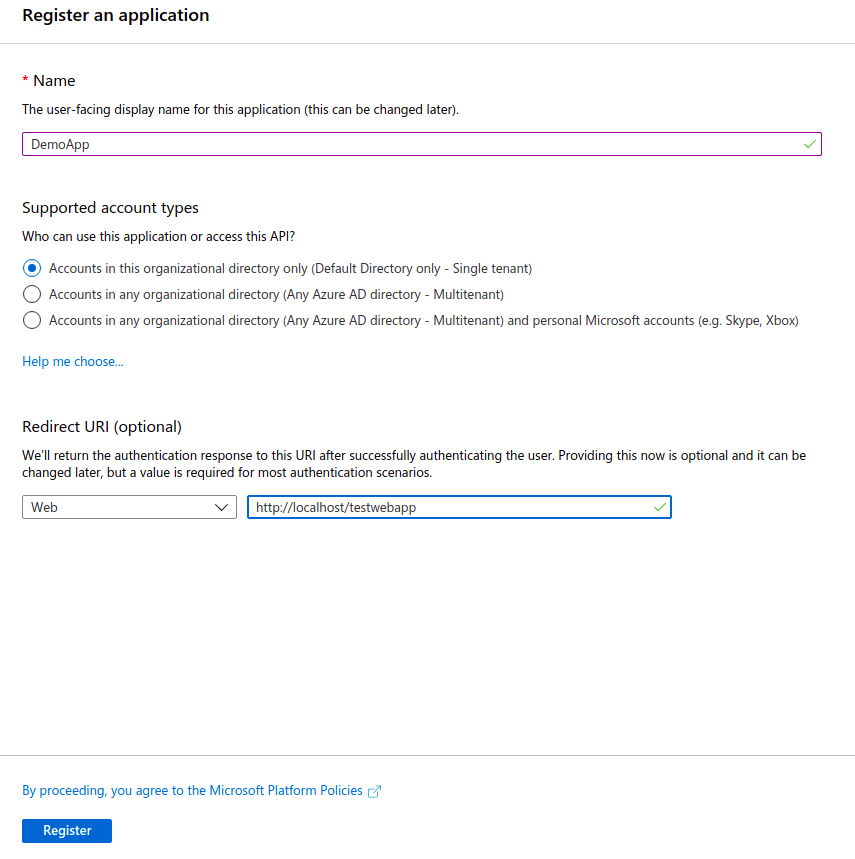
Provide a name (Ex: DemoApp)
-
In Supported account types there are three types
◦ Accounts in this organizational directory only (Default Directory only - Single tenant)
◦ Accounts in any organizational directory (Any Azure AD directory – Multitenant)
◦ Accounts in any organizational directory (Any Azure AD directory - Multitenant) and personal Microsoft accounts (e.g. Skype, Xbox)
You can select one of these options according to your requirement.
-
In Redirect URI, select any type from the drop-down and provide the redirect URI which you’ll be redirected after you are signed in (Ex: http://localhost/testwebapp)
-
Register the app
-
Go to the created App registration (in our example DemoApp), then go to Authentication
-
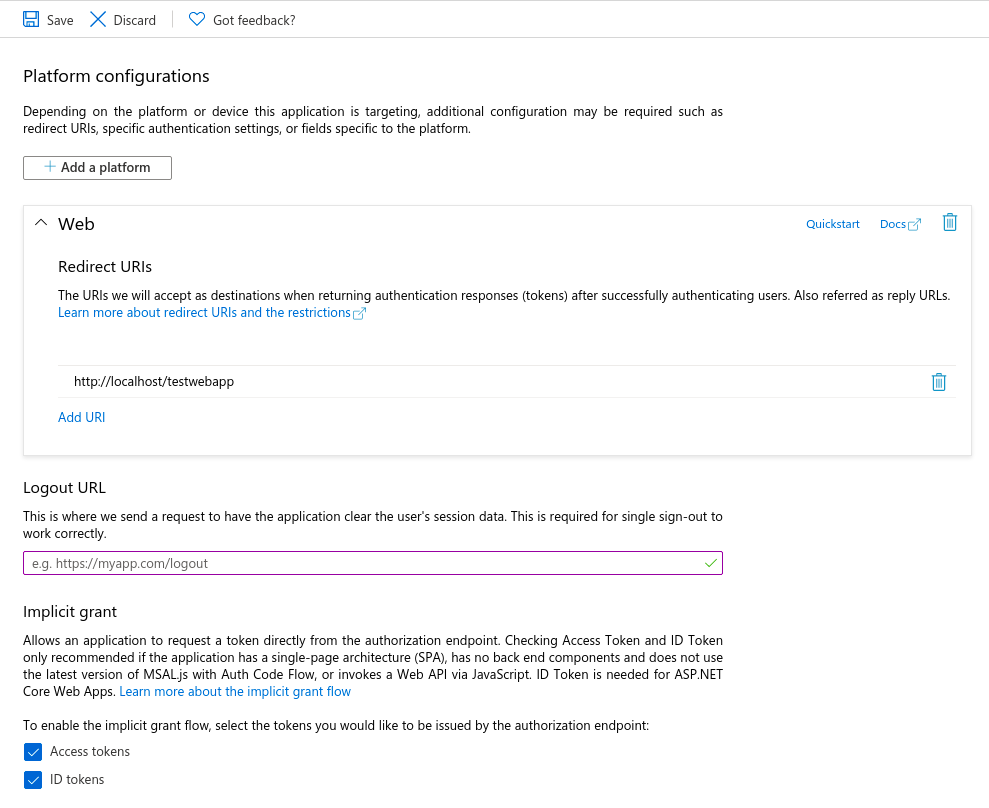
If you want your application to logout from SSO when you are signing out from other Microsoft websites. You can specify a your application’s logout method URL inside the Logout URL (This is important when application is hosted, otherwise you won’t need this in localhost)
-
In Implicit grant section enable Access tokens and Id tokens and save the changed settings
-
Now you need to give Graph API permissions to the application
-
Go to API permissions click on Microsoft Graph in permissions
◦ There are two types of permissions
- Delegated permissions
This means application need a signed in user to access for the given permission
- Application permissions
This means application does not need a signed in user to access for the given permission
-
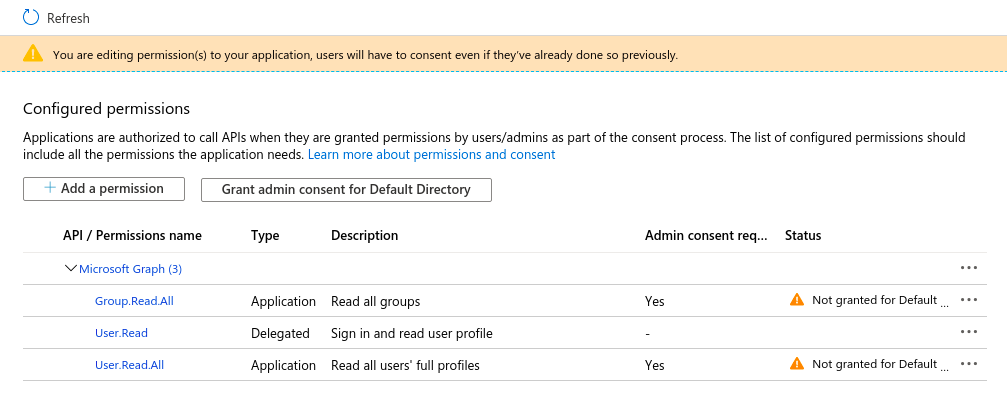
For the simplicity we’ll just have Delegated permission to read active user and Application permissions to read all users and read all groups
-
Select Delegated permissions, expand User and enable User.Read.
-
Select Application permissions, expand Group and enable Group.Read.All, expand User and enable User.Read.All
-
Then click on Update permissions
-
Click on Grant admin consent for Directory in order to consent permissions you have provided
-
Now let’s create a client secret, Go to Certificated & secrets and create New client secret and copy the secret value once it’s been created, otherwise later it’ll be hidden you wont able to see it.
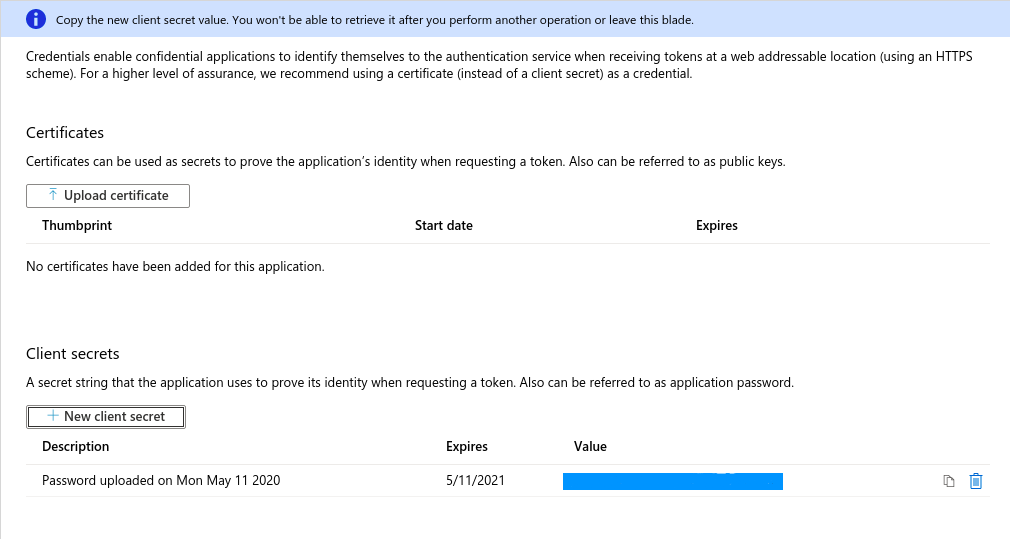
- From side panel go to Overview and copy the Application (client) ID and Directory (tenant) ID values

- For the later implementations you need above copied values.
### Now app registration is done. Let’s move on to the cool part. Let’s code
We’ll discuss how to setup SSO with your .NET core applications
First take a look how to authenticate
-
I suggest you to keep constant values globally. For the simplicity I have added those values to .config file and used them in the code.
-
Modify your Startup.cs file as follows. If you don’t have a Startup.cs file create one.
◦ In the following code segment we are using
-
ClieniId = (From above step)
-
TenantId = (From above step)
-
RedirectUri = (From above step)
-
AADInstane = ‘https://login.microsoftonline.com/’
using Microsoft.Owin.Security.Cookies;
using Microsoft.Owin.Security.OpenIdConnect;
using Owin;
using System.Configuration;
using System.Linq;
using System.Security.Claims;
using System.Threading.Tasks;

[assembly: OwinStartup(typeof(TestWebApp.Startup))]
namespace TestWebApp
{
	public partial class Startup
	{
		private static readonly string clientId = ConfigurationManager.AppSettings["ClientId"];
		private static readonly string tenantId = ConfigurationManager.AppSettings["TenantId"];
		private static readonly string loginRedirectUri = ConfigurationManager.AppSettings["RedirectUri"];
		private static readonly string aadInstance = ConfigurationManager.AppSettings["AADInstance"];
		private static readonly string authority = $"{aadInstance.TrimEnd('/')}/{tenantId}";

		app.SetDefaultSignInAsAuthenticationType(CookieAuthenticationDefaults.AuthenticationType);

		app.UseCookieAuthentication(new CookieAuthenticationOptions()
		{
		    SlidingExpiration = true,
		    ExpireTimeSpan = new System.TimeSpan(7, 0, 0, 0)
		});

		app.UseOpenIdConnectAuthentication(new OpenIdConnectAuthenticationOptions
		{
		    ClientId = clientId,
		    Authority = authority,
		    RedirectUri = loginRedirectUri,
		    PostLogoutRedirectUri = loginRedirectUri,

		    Notifications = new OpenIdConnectAuthenticationNotifications()
		    {
		        AuthenticationFailed = (context) =>
		        {
		            return Task.FromResult(0);
		        },
		        SecurityTokenValidated = (context) =>
		        {
		            var claims = context.AuthenticationTicket.Identity.Claims;
		            var groups = from c in claims
		                            where c.Type == "groups"
		                            select c;

		            foreach (var group in groups)
		            {
		                context.AuthenticationTicket.Identity.AddClaim(new Claim(ClaimTypes.Role, group.Value));
		            }
		            return Task.FromResult(0);
		        }
		    }
		});

		// This makes any middleware defined above this line run before the Authorization rule is applied in web.config
		app.UseStageMarker(PipelineStage.Authenticate);
	}
}
You can handle claims Inside the SecurityTokenValdated callback.
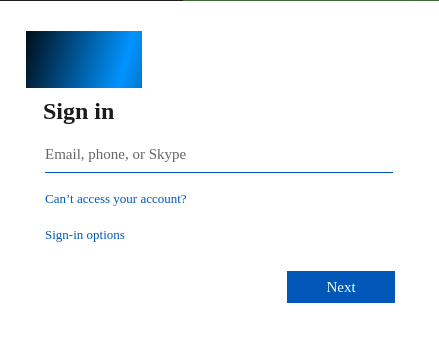
- Now the OpenIdConnect middleware will handle the authentication for you. Via this implementation if your context is not authenticated you’ll be redirected to the Microsoft login page. And when you are login with your Microsoft credentials you’ll be redirected to the RedirectUri that you have provided (In this case your application url) with a authentication cookie and your context will be authenticated by the middleware simple as that.
-
PostLogoutRedirectUri is where you define which URL you should be redirected when you are logged out and login again otherwise login does not have a clue were you have logged out from. In this case we have provided same RedirectUri. So if we logged out from the application it’ll redirect to the Microsoft login and if we login again we’ll be redirected to our site again.
-
Now your context is authenticated. So you can check whether context is authenticated and get your identity details. If you are not authenticated we can reauthentcate with GetOwinContext().Authentication.Challenge()
public string GetUserName()
{
    if (HttpContext.Current.User.Identity.IsAuthenticated)
    {
        return HttpContext.Current.User.Identity.Name;
    }
    else
    {
        HttpContext.GetOwinContext().Authentication.Challenge();
        return null;
    }
}
How to implement LogOut
- If you want to implement logout, you can just do that with GetOwinContext().Authentication.SignOut()
public string SignOut()
{
    HttpContext.GetOwinContext().Authentication.SignOut();
}
Congratulations!! You have integrated SSO authentication for your application.
Lets see how to use GraphAPI to fetch AD users and groups in your application.
Initiating the Graph Client
-
You’ll need to install Microsoft.Graph nuget package.
-
To access GraphAPI all you need are following which have already copied from App Registration step. As I said early it’s better you added those to your.config file
-
Following values are used in impementation
▪ ClieniId = (From app registration)
▪ TenantId = (From app registration)
▪ ClieniId = (From app registration)
▪ GraphUrl = ‘https://graph.microsoft.com/’
- Now we are going to initiate a GraphApi client to access the Active Directory
string tenantId = ConfigurationManager.AppSettings["TenantId"];
string clientId = ConfigurationManager.AppSettings["ClientId"];
string clientSecret = ConfigurationManager.AppSettings["ClientSecret"];
string graphUrl = ConfigurationManager.AppSettings["GraphUrl"];

var clientApplication = ConfidentialClientApplicationBuilder.Create(clientId)
    .WithClientSecret(clientSecret)
    .WithClientId(clientId)
    .WithTenantId(tenantId)
    .Build();

var authResult = clientApplication.AcquireTokenForClient(new string[] { $"{graphUrl.TrimEnd('/')}/.default" })
    .ExecuteAsync().GetAwaiter().GetResult();

var graphClient = new GraphServiceClient(new DelegateAuthenticationProvider((request) =>
    {
        request.Headers.Add("Authorization", authResult.CreateAuthorizationHeader());
        return Task.FromResult(0);
    }));
- Simple as that you just initiated a graph client. Now the hard part is done & let’s play with the Active Directory
Fetching the Active Directory user list
- Let’s see how to get all the users in the active directory.
    var users = graphClient.Users.Request().GetAsync()
    .CurrentPage.Select(u =>
    {
        return u as User;
    }).ToList();
- Here you might be wondering why we are using CurrentPage. It’s because the response comes as pages. So you need to get User objects from the page.You’ll see this in next example too.
Fetching the Active Directory Groups and it’s Users
- Last but not least lets see how to get all the groups and there users
    var groupName = 'UserGroup'; //Whichever a group you have defined in AD

var groups = await graphClient.Groups[group.Id].Members.Request().GetAsync();

var group = groups.FirstOrDefault(g => g.DisplayName == groupName);

var users = new List<User>();

if (group != null)
{
    var result = await graphClient.Groups[group.Id].Members.Request().GetAsync();

    do
    {
        users.AddRange(result.Select(u =>
            {
                return u as User;
            }).ToList());
    }
    while (result.NextPageRequest != null && (result = await result.NextPageRequest.GetAsync()).Count > 0);
}
Wolaa All done!! Now you have successfully integrated SSO and accessed Active Directory via Graph API
That’s all I wanted to share with you within this blog post. Hope you got some knowledge about Active Directory and SSO integration. Hope my explanation and examples are clear enough to understand the implementation.
Thank you for reading!! See you in an another blog post…

