Flutter CustomPaint and ClipPath for highly customized UI design
By Amith DissanayakaFlutter CustomPaint and ClipPath for highly customized UI design.
Mainly simple flutter application has three main components.
- Widget – holds the configuration of the UI.
- Element – holds the position of the UI hierarchy, manage life cycles and handles parent child relationships.
- RenderObject – knows about layouts and paints the UIs.
Widgets are the main basic unit in any UI and according to the state and configuration, widgets describe their view. Flutter render user interfaces by combining multiple widgets as a widget tree. Flutter has a huge number of widgets to design nice UIs., Text, Row, Column, Stack, Container are the some of basic common widgets use to build simple UI. But the major problem that developers faced is implement highly customized UI design.
But no need to worry. By using CustomPaint and ClipPath you can handle very custom user interfaces.
CustomPaint
CustomPaint widget gives you access to low-level graphics. It simply provides a canvas and allow custom painter to execute paint commands. This includes multiple shapes and you have the full control of how to paint is (colors, shaders, blend modes …).
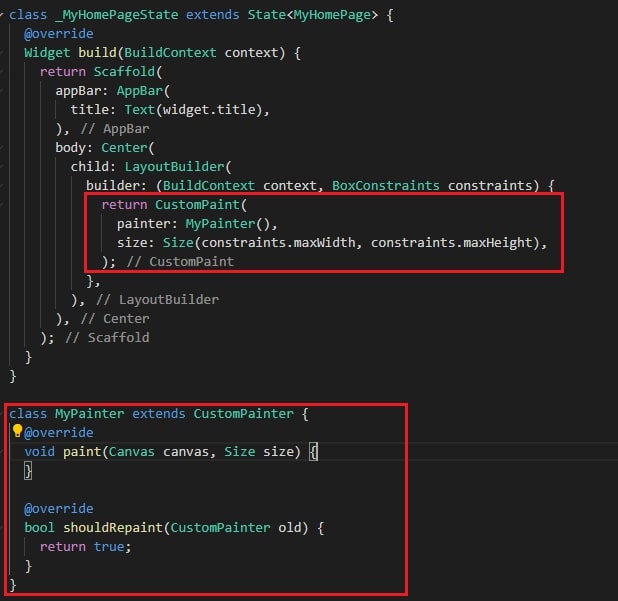
Usage
To use CustomPaint, first you need to add CustomPaint widget to the widget tree and give it to a size and painter. Then simply implement your painter class by extending CustomPainter class.
Here you have to implement 2 methods.
- Paint – gives a canvas and it allows draw.
- shouldRepaint – called when custom painter rebuilds.
Methods for draw Shapes
- canvas.drawLine() – draw line between two points.
- canvas.drawRect() – draw a rectangle with the given paint.
- canvas.drawCircle() – draw a circle with center point and radios.
- canvas.drawArc() – draw an arc scaled to fit inside the given rectangle.
- canvas.drawPath() – draw a given path.
- canvas.drawImage() – draw a given image into canvas with its top-left corner at the given offset.
- canvas.drawImageNine() – draw a given image into canvas using given paint.
- canvas.drawParagraph() – draw a given text paragraph into the canvas.
each of these methods accept property named paint to define styles of the drawing.
Simple example
In this example you can see how to draw a bell curve shape according to the mean and standard deviation of a particular dataset.
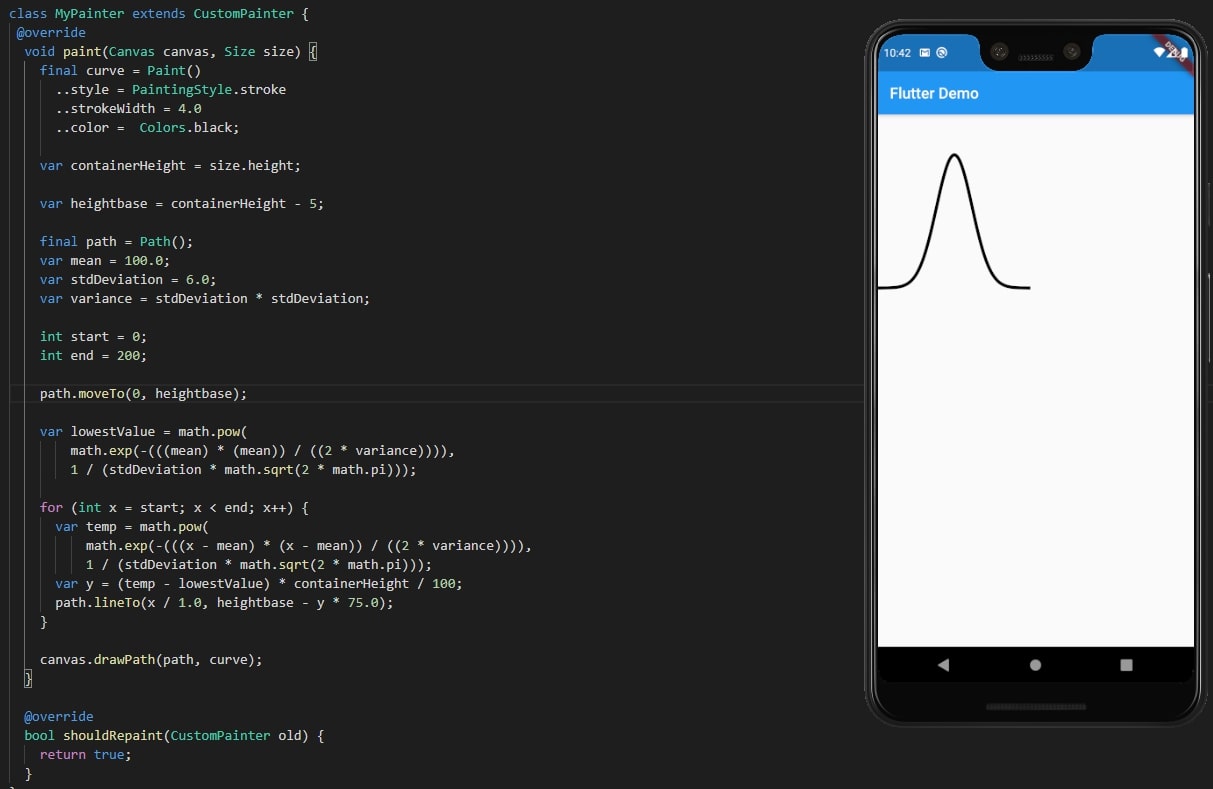
class MyPainter extends CustomPainter {
@override
void paint(Canvas canvas, Size size) {
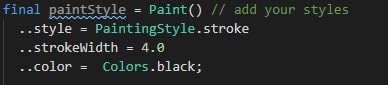
final curve = Paint()
..style = PaintingStyle.stroke
..strokeWidth = 4.0
..color = Colors.black;
var containerHeight = size.height;
var heightbase = containerHeight - 5;
final path = Path();
var mean = 100.0;
var stdDeviation = 6.0;
var variance = stdDeviation * stdDeviation;
int start = 0;
int end = 200;
path.moveTo(0, heightbase);
var lowestValue = math.pow(
math.exp(-(((mean) * (mean)) / ((2 * variance)))),
1 / (stdDeviation * math.sqrt(2 * math.pi)));
for (int x = start; x < end; x++) {
var temp = math.pow(
math.exp(-(((x - mean) * (x - mean)) / ((2 * variance)))),
1 / (stdDeviation * math.sqrt(2 * math.pi)));
var y = (temp - lowestValue) * containerHeight / 100;
path.lineTo(x / 1.0, heightbase - y * 75.0);
}
canvas.drawPath(path, curve);
}
@override
bool shouldRepaint(CustomPainter old) {
return true;
}
}
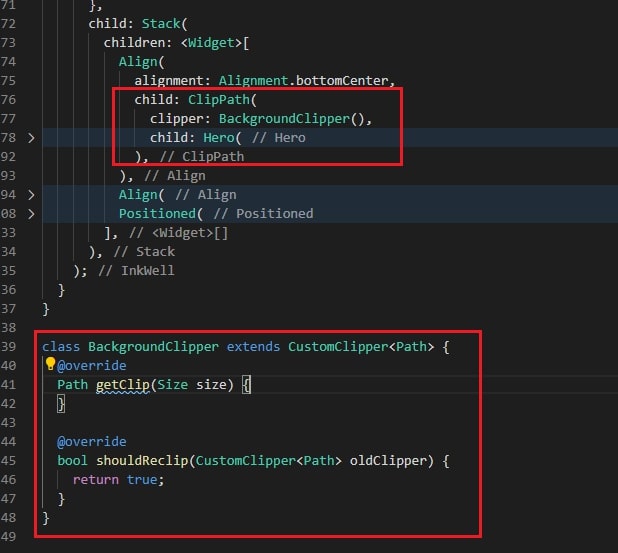
ClipPath
CustomClipper widget allow custom clipper to clip area to any custom shape.
Usage
To use ClipPath, first you need to add ClipPath widget to the widget tree. Then assign widget that you need to clip to the child property. Create Clipper class by extending CustomClipper class and assign it to clipper property.
Here also you need to implement 2 methods.
- getClip – return your custom path.
- shouldReclip – called when CustomClipper rebuild.
Methods for clip Path
- lineTo() – add line to the path from current point to given point.
- moveTo() – Move path curser to given point and starts sub path.
- qudraticBezierTo() – add quadratic bezier of the path according to the given points.
- arcToPoint() – add arc to the path using radios.
- cubicTo() – add cubic to the path using 3 points.
Simple example
In this example you can see how to clip and redesign default card view to a custom shape.
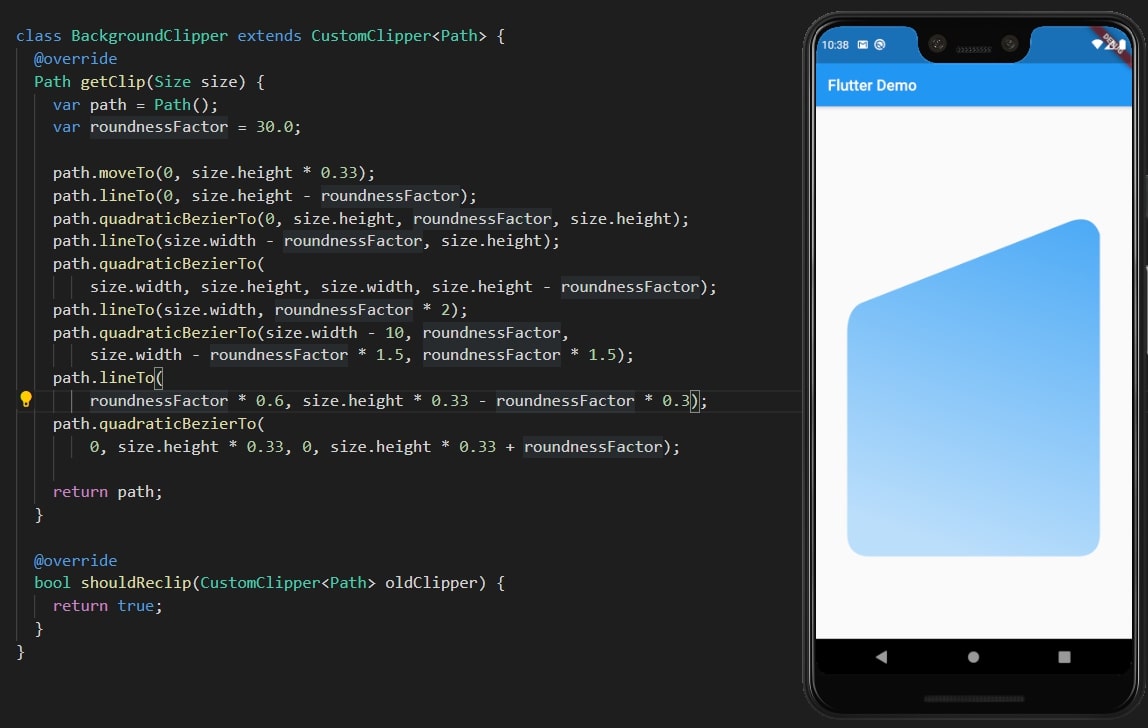
class BackgroundClipper extends CustomClipper<Path> {
  @override
  Path getClip(Size size) {
    var path = Path();
    var roundnessFactor = 30.0;

    path.moveTo(0, size.height * 0.33);
    path.lineTo(0, size.height - roundnessFactor);
    path.quadraticBezierTo(0, size.height, roundnessFactor, size.height);
    path.lineTo(size.width - roundnessFactor, size.height);
    path.quadraticBezierTo(
        size.width, size.height, size.width, size.height - roundnessFactor);
    path.lineTo(size.width, roundnessFactor * 2);
    path.quadraticBezierTo(size.width - 10, roundnessFactor,
        size.width - roundnessFactor * 1.5, roundnessFactor * 1.5);
    path.lineTo(
        roundnessFactor * 0.6, size.height * 0.33 - roundnessFactor * 0.3);
    path.quadraticBezierTo(
        0, size.height * 0.33, 0, size.height * 0.33 + roundnessFactor);

    return path;
  }

  @override
  bool shouldReclip(CustomClipper<Path> oldClipper) {
    return true;
  }
}
References
- https://medium.com/flutter-community/flutter-custom-clipper-28c6d380fdd6
- https://api.flutter.dev/flutter/widgets
- https://blog.codemagic.io/flutter-custom-painter/
- https://gist.github.com/afzalali15/6d5c485eb6a5f64116f35a0360eea94f
- https://api.flutter.dev/flutter/dart-ui/Canvas/
- https://api.flutter.dev/flutter/dart-ui/Path