Quick dive into Nginx
By Chalith DesamanProbably you might’ve heard nginx word, but wondering what’s it. Well, easy peasy!! it’s a web server, and also a reverse proxy, load balancer, mail proxy and HTTP cache. It’s a lot right! I might’ve made it more Greek for you. In that case let me assure you. If you manage to hang in all the way to the end of this blog you might realize nginx is not an alien.
So let’s begin,
Spoiler alert - The demo steps in this blog is made for Ubuntu users. But you are welcome to try read and get an understanding about the nginx. Knowledge matters right?
Let me tell you how nginx came to world. It was created by Igor Sysoev. And publicly released in 2004. It’s a free open-source software released under the terms of the 2-clause BSD license.
Now, if you’d remember I’ve said the word reverse proxy. Ok, whats that? Let’s see what’s a forward proxy and whats a reverse proxy.
Forward proxy and Reverse proxy
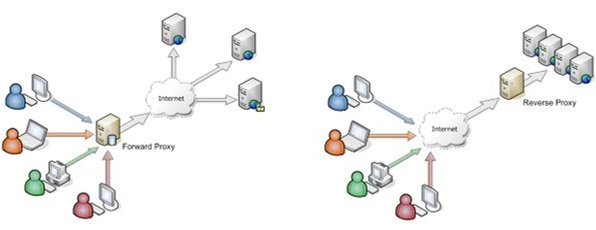
Forward Proxy
Routes traffic between clients and servers in another network. Proxy servers act as a firewall and web filter, provide shared network connections, and cache data to speed up common requests. So forward proxy is used to protect clients.
Reverse proxy
Unlike forward proxy this is used to protect servers. Reverse proxy server forwards the client request to one of many servers and return the result from the server as if the proxy server processed the request itself.
Difference
Forward proxy server acts on behalf of multiple clients and allows client’s traffic to flow to an external network. On the other hand reverse proxy server routes external client’s traffic on behalf of multiple servers.
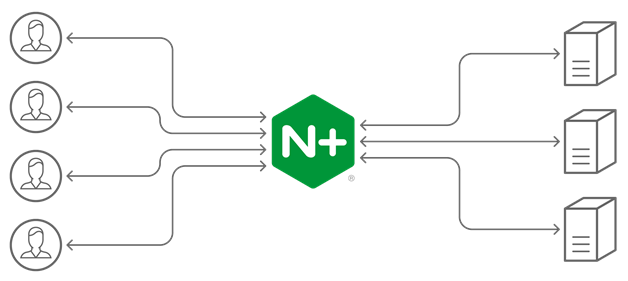
Now you know what’s a reverse proxy means. Let’s see how nginx work.
- Nginx has a master process and several worker processes. Master process read and evaluate configurations and maintain worker processes.
- The master process performs the privileged operations such as reading configuration and binding to ports, and then creates a small number of child processes (the next three types).
- The cache loader process runs at startup to load the disk-based cache into memory, and then exits. It is scheduled conservatively, so its resource demands are low.
- The cache manager process runs periodically and prunes entries from the disk caches to keep them within the configured sizes.
- The worker processes do all of the work! They handle network connections, read and write content to disk, and communicate with upstream servers.
Okay theory is over, let’s do some coding. As I said this tutorial is made for Ubuntu OS. But you can try and understand the concept. In following section you’ll be taken through a step by step guide for getting started with nginx. It’ll be better to try out these steps as you go.
Ok, let’s begin.
Install Nginx
Ngingx is available in Ubuntu’s default repositories, so installation is straightforward.
So, install nginx as follows.
sudo apt update
sudo apt install nginx
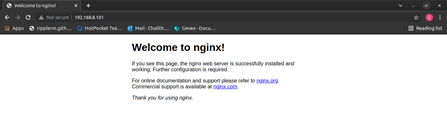
After the installation if we go to our ip address or the localhost on the browser, we’ll see the default nginx page.
Ok, Lets see what we have installed,
Content directory
/var/www/html contains the web content. By default this contains default nginx page which we’ve loaded in previous step.
This can be changed by altering the configuration file.
Any static pages or any virtual host can be placed here.
- Virtual host is a method of hosting multiple domain names in the same server.
Configuration
/etc/nginx contains all the nginx configuration files.

/etc/nginx/nginx.conf is the main configuration file. This contains the global configurations.
Just see the content by
cat /etc/nginx/nginx.conf
/etc/nginx/sites-available/ contains server blocks of sites. Nginx only uses these configuration files if they are linked to sites-available directory. Usually all server block configurations are done in sites-available directory and enabled by linking to sites-enabled directory.
/etc/nginx/sites-enabled/ contains server blocks of enabled sites. Usually these are links of configuration files in sites-available

/etc/nginx/snippets contains configuration fragments which can be included in nginx.conf. It’s good practice to place reusable configuration segments here.
Logs
/var/log/nginx/access.log records every request to the web server. And also nginx can be configured not to do the logging as well.
/var/log/nginx/error.log records the nginx errors.
Ok, that’s that. Let’s see what the basic usefull nginx commands are.
Stop nginx web server
sudo systemctl stop nginx
Start nginx web server
sudo systemctl start nginx
Restart nginx server
sudo systemctl restart nginx
When configuration is changed we can reload the service
sudo systemctl reload nginx
Disable auto restarting the service after reboot
sudo systemctl disable nginx
Enable auto restarting the service after reboot
sudo systemctl enable nginx
Test the config file
sudo nginx -t
If the config has no issues, Output will be,

Right, now about the master process…
We can give signals to nginx by
nginx -s <signal>
The signals are
stop - fast shutdown
quit - graceful shutdown
reload - reloading the configuration file
reopen - reopening the log files
When we give nginx -s reload master process reads the configuration and check the syntax, then starts new processes and send message to old processes to shut down. If the syntax check failed master process will be rolled back and starts working with old configurations.
Ok, now you know the basic nginx commands. Lets see how nginx is configured to serve a simple web page, backend and images. Lets go through following steps,
For following steps we use www.mysite.com domain as the server name. So first you need to setup a virtual host for this domain. Lets see how it’s done.
Edit the /etc/hosts file
sudo vim /etc/hosts
Add following line, or edit if exists.
127.0.0.1 localhost www.mysite.com
Now we have setup the virtual host. So you can freely try following examples.
1st example - Creating a simple website
First, we create the html page to be served.
Go to /var/www/html directory
cd /var/www/html
We need sudo permission to do operations inside this directory.
Lets change terminal to a super user session.
sudo su
Create a directory mysite and go inside that directory
mkdir mysite && cd mysite
Then create a index.html file with html content inside this directory.
echo This is my test site > index.html
Now you can exit from the super user terminal. Type exit and Enter.
Then, we need to tell nginx about our web site, so that we need to add configuration. As we discussed you know that, we need to add configurations in sites-available and sites-enabled directories.
Here, for easiness we’ll directly setup the config in sites-enabled directory. At the end of the examples I’ll tell you how to link server file inside sites-available directory to the sites-enabled directory.
Go to /etc/nginx/sites-enabled directory
cd /etc/nginx/sites-enabled
Create a file named mysite.conf
sudo vim mysite.conf
And vim editor will be opened.
Press I for edit mode.
Paste the following content inside the editor and press Esc + : + w + q keys to save and exit the editor.
server {
       listen 80;
       listen [::]:80;

       server_name www.mysite.com;

       root /var/www/html/mysite;
       index index.html;

       location / {
               try_files $uri $uri/ =404;
       }
}
Here the root is the directory of the site and index is the file to be served. So we are listening to port 80
Then restart the nginx service
sudo service nginx restart
Visit the http://www.mysite.com from the browser and you’ll be directed to the html page we’ve created early.

2nd example - Serving a back end with nginx
Start your backend app, lets say it’s running on localhost port 3000.
For example just create a simple node js server app and use it.
I’ve created a simple node js express app which has a get method returns following list as response.
["Tony", "Lisa", "Michael", "Ginger", "Food"]
Let me quickly tell you how it’s done.
In any place you want, create a directory test-backend.
Inside it create a file named app.js with following content
var express = require("express");
var app = express();
app.listen(3000, () => {
    console.log("Server running on port 3000");
});
app.get("/names", (req, res, next) => {
    res.json(["Tony", "Lisa", "Michael", "Ginger", "Food"]);
});
And create a package.json file with following content.
{
    "name": "app",
    "dependencies": {
        "express": "^4.17.1"
    }
}
Then, inside the directory run
npm i
Now the backend api is ready,
Then run your api.
node app.js
So if you visit localhost:3000/names it’ll give you the list as response.
So, this is my sample backend. You can have any backend you have and point it from nginx as follows.
Same as previous example we need to create or edit the config file in the sites-enabled directory.
Go to /etc/nginx/sites-enabled directory
cd /etc/nginx/sites-enabled
Create a file named mysite.conf
sudo vim mysite.conf
And vim editor will be opened.
Press I for edit mode.
Paste the following content inside the editor and press Esc + : + w + q keys to save and exit the editor.
server {
       listen 80;
       listen [::]:80;

       server_name www.mysite.com;

       root /var/www/html/mysite;
       index index.html;

       location / {
               try_files $uri $uri/ =404;
       }

        location /api/ {
               proxy_pass http://localhost:3000/;
       }
}
Here we configure the /api route to app which is running on localhost port 3000.
Then restart the nginx service
sudo service nginx restart
Now if you go to http://www.mysite.com/api/names you’ll be directed to your backend.

3rd example - Serving images
Create directory /usr/images/
sudo mkdir -p /usr/images/
Place a image named test.png in this directory.
Same as above example we need to create or edit the config file in the sites-enabled directory.
Go to /etc/nginx/sites-enabled directory
cd /etc/nginx/sites-enabled
Create a file named mysite.conf
sudo vim mysite.conf
And vim editor will be opened.
Press I for edit mode. Paste the following content inside the editor and press Esc + : + w + q keys to save and exit the editor.
server {
       listen 80;
       listen [::]:80;

       server_name www.mysite.com;

       root /var/www/html/mysite;
       index index.html;

       location / {
               try_files $uri $uri/ =404;
       }

        location /api/ {
               proxy_pass http://localhost:8080/;
       }

        location /images {
               alias /usr/images/;
       }
}
Here we configure the /images route to serve images which are placed in ~/uploads/images/.
Then restart the nginx service
sudo service nginx restart
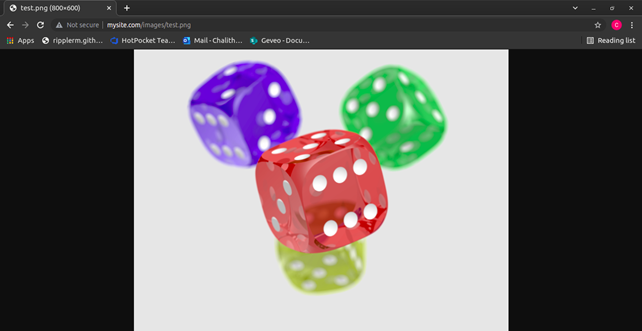
Now if you go to http://www.mysite.com/images/test.png you’ll see your image in the browser
In above examples we directly created config files inside sites-enabled directory.
But as we discussed we can create config files inside sites-available and then they can be linked to sites-enabled directory which is the typical practice.
To do so, Create the the config file in /etc/nginx/sites-available directory.
sudo vim /etc/nginx/sites-available/mysite.conf
Add the config content.
And then do the linking
sudo ln -s /etc/nginx/sites-available/mysite.conf/etc/nginx/sites-enabled/mysite.conf
All done, Now it’ll work as it did before.
Yeah!! simple as that. Now you have the basic knowledge about the nginx.
Hope you enjoyed, Thanks for hanging in until the end. See you in an another blog.
Happy playing with nginx!!!
Read these references if you hope to study further about nginx..
https://en.wikipedia.org/wiki/Nginx
http://nginx.org/en/docs/beginners_guide.html
https://www.strongdm.com/blog/difference-between-proxy-and-reverse-proxy
https://medium.com/adrixus/beginners-guide-to-nginx-configuration-files-527fcd6d5efd