Newman Command Line Integration for API Testing with POSTMAN
By Nadeesha GnanaratneAPI (Application Programming Interface) testing is one of the latest trends in software testing. Basically an API enables the communication & data exchange between two separate software systems. An API contains functions/sub functions which can be invoked by another software system. Testing an API is different from conventional UI testing because the tester needs to test the business layer rather than the presentation layer.
In the context of API testing & development POSTMAN is a REST client to test RESTful APIs. Not only to send requests & receive responses from a particular API but also provides with a full-featured testing sandbox to write & execute JavaScript based tests for the API.
When it comes to API testing with POSTMAN it’s a tedious & inefficient task to execute requests one by one from a large collection of requests. Assume there are 20 HTTP requests & associated tests for each request. Executing each request separately would consume lot of amount of time. And also it’s hard to get a proper insight about the test results when executing requests separately.
Considering above problems which occurs running requests separately could be avoided by using Newman. Newman is a command line collection runner for POSTMAN. It allows to run & test a POSTMAN collection directly from the command line. It would give a clear insight regarding the test results. Below steps will guide you to running a POSTMAN collection with command line.
Test Scenario: HTTP POST method SignIn would create an authentication token. The other methods would use that generated authentication token as a header when sending the request.
STEP1 - Install POSTMAN native app & send a request
You can install POSTMAN native app depend on the OS from below link
https://www.getpostman.com/apps
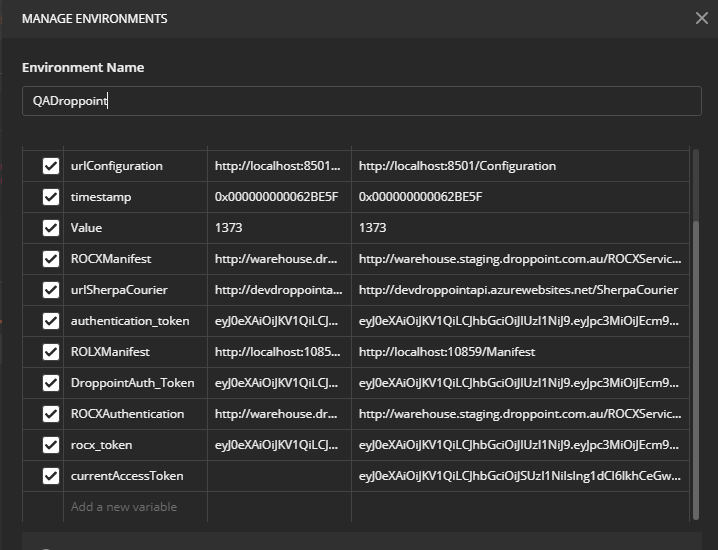
First of all you should have to create an environment to create & send requests. To create an environment click on Manage Environments from Environment options. From MANAGE ENVIRONMENTS modal click on add button. Add an environment name & add key value pairs. These key value pairs could be used as within the environment.
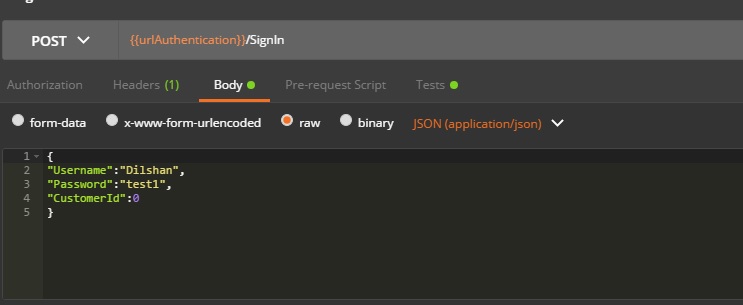
- Enter /SignIn POST request in the URL field or you can use the entire URL http://localhost:8501/Authentication/SignIn. And add request body & set the content type as application/JSON
-
Click on ‘Send’ button to send the request
-
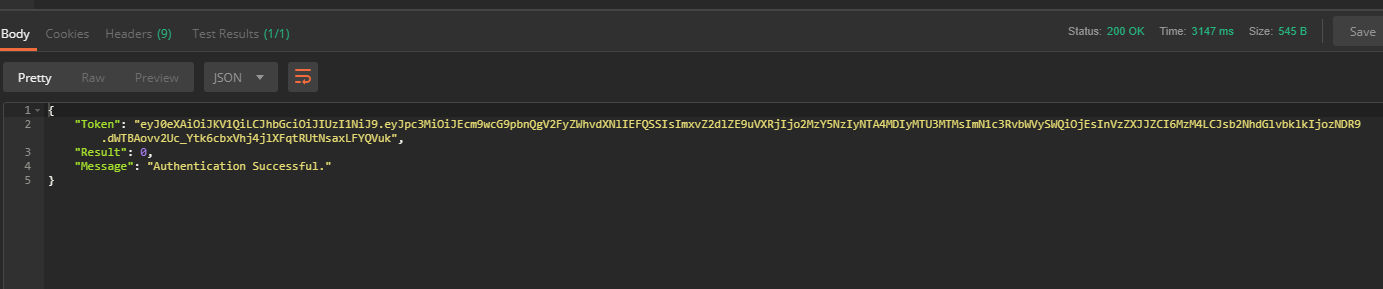
You can see the response body in JSON format where SignInOperationResultValue(authentication token) has been received which have to be send in the header of other requests.
STEP 2 – Script to add dynamic behavior to requests
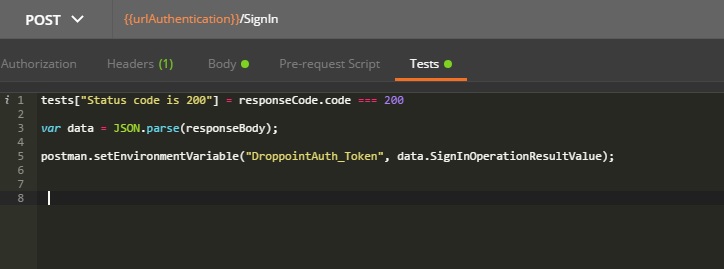
- Add a script to fetch the authentication token generated from a particular request .In manage environments modal add a key as < DroppointAuth_Token >. From below script, generated authentication token from the SignIn request would capture to the DroppointAuth_Token parameter. From that approach we can maintain the flow of request execution from a proper manner. After execution of the below script would capture the token in to the placeholder in the created environment where could be used by other requests if we defined that common parameter in the request header as .
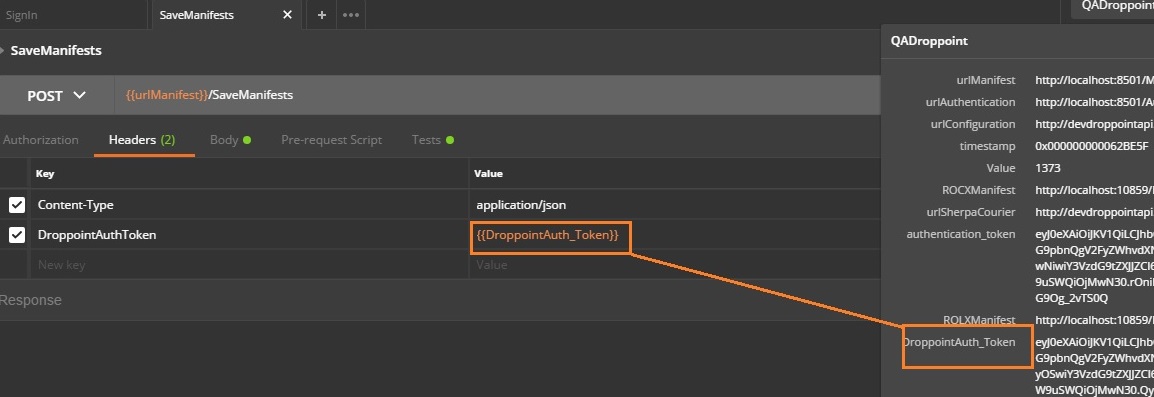
- Above request /SaveManifests request header requires generated authentication token. Current approach would be affective if we’ve got a token which would’ve been expired.
STEP 3 – Add a POSTMAN collection
-
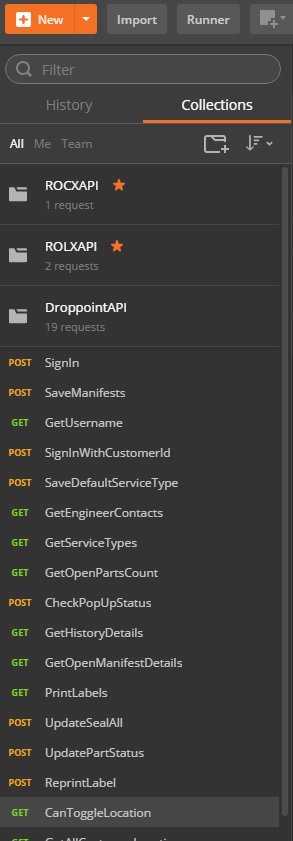
A POSTMAN collection consists of set of requests which could be used to test a particular API. Or it can be defined as a collection of HTTP requests (GET, POST, PUT, and DELETE) and associated pre-request scripts or test scripts. Assume ‘TESTAPI’ collection consists of 12 requests (SignIn, SaveManifests, GetUsername, CanToggleLocation etc.). Specific thing is we have to send every request in a specific order. After sending ‘SignIn’ request would initiate other requests because generated authentication token needs to be send in the request header of other requests. Because of that kind of dependency does exists, we can consider a POSTMAN collection as a kind of ordered test.
-
To add a request to a POSTMAN collection, you have to click on ‘Save’ button after creation of the request. It would prompts the below modal.

You can specify the name of your collection from the above modal. Pre created collection shows in the below image.
STEP 4 – Environment setup for Newman
Newman [resides in the NPM registry and on GitHub] is a command line collection runner for POSTMAN. It facilitates the POSTMAN collections to be integrate with continuous integration (CI) servers like Jenkins & Travis CI for GitHub. Also can be integrate with build systems. Most important thing is with just one command you can run your entire collection & take a proper insight regarding the collection.
-
Newman is built on Node.js so you have to install Node.js on your machine prior Newman installation.
-
After Node.js installation Newman is just a command away. You can install Newman from npm globally which allows you to run it from anywhere.
$ npm install -g newman
STEP 5 – Export POSTMAN collection as a .JSON file
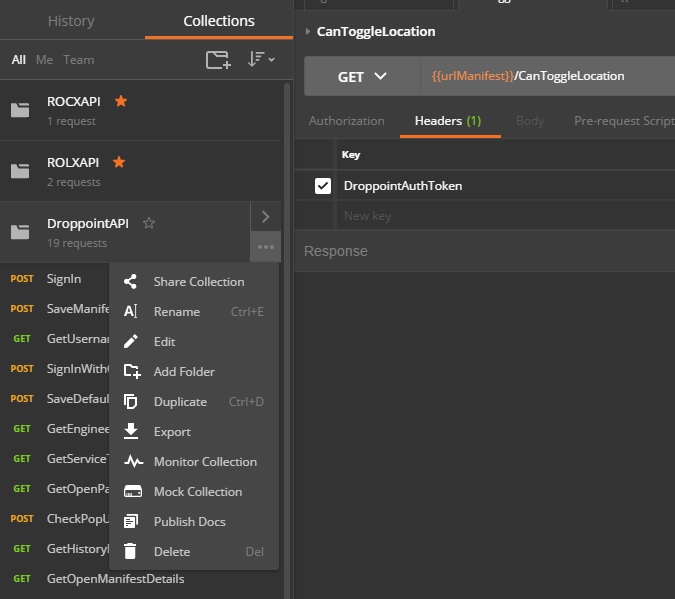
Click on the ellipses (…) next to the collection you wish to export.
Click on ‘Export’ option will navigate you to EXPORT COLLECTION modal. Which you can select the second option (Collection v2). After that you can save the .json file for the selected POSTMAN collection.

STEP 6 – Run the POSTMAN collection from Newman
$ newman run mycollection.json
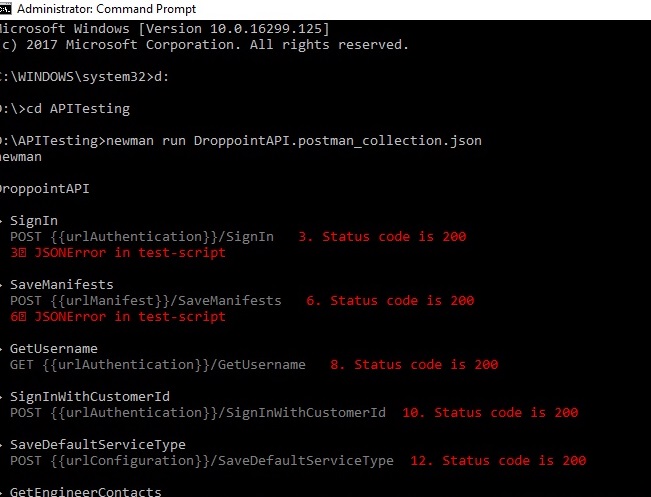
- Above command would run the entire collection & provides you with necessary details regarding the requests within the collection.
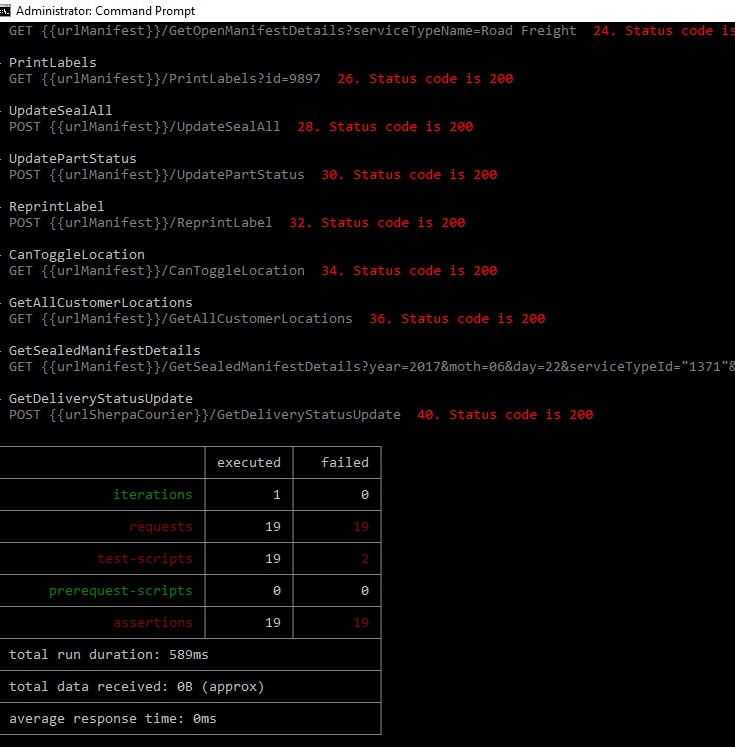
- Above gist generated from Newman would provide you with the status of the desired POSTMAN collection. In other words, you can get the answer to the most important question you’ve been suffering from “Is that API functioning as expected”?
HAPPY TESTING!!