Mobile UI Automation Using Flutter Driver
By Ruwani MithrasenaBefore starting to know about how to do the UI automation using flutter driver, let’s see what is flutter and why we need to choose flutter to you app?
Flutter is;
- Free and open source project developed and maintain by Google
- Flutter uses “DART” as the programming language
- Flutter is fast, smooth and capable of running apps in 120fps
- Since it has its own widgets, its highly customizable
It’s really important to choose flutter for mobile application development since it’s gives benefits such as;
- Great for MVP – Developers just need to create the MVP architecture and start coding
- Single code for multiple platforms – There will be no compatible issues. Can use one code base to develop both android and IOS applications
- Faster QA Process – Since there is only one version develop for both android and IOS developments testing time get reduce.
- Engaging design – Have multiply widgets which can be easily customizable as per the customer requirement
- Rapid App Development – Easily see the changes done in the development by hot reloading the pages
Flutter Driver is a testing framework specially made to test the flutter apps, it’s very similar to testing frameworks such as Selenium driver, Protractor and Google espresso. Can use to test various UI elements and helps to write end to end integrations test. To write the test have to use DART language.
How does UI testing works in flutter?
- Flutter UI tests run as a black boxes
- Flutter UI tests cannot access the data or API of the main Flutter apps which brings additional challenges to testing the UI of Flutter apps
- Flutter UI tests work as a pair
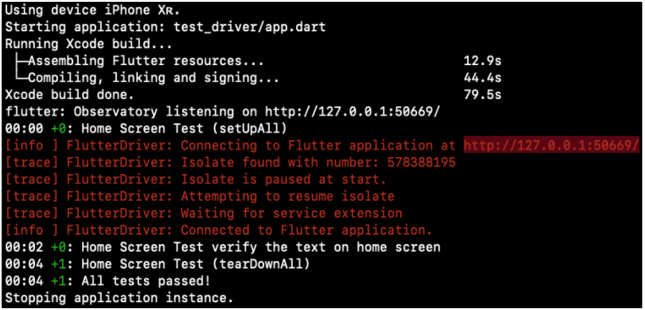
- Flutter Driver tests start a local server where you can see the test logs as follows;
There are three main testing types supported by flutter
- Unit Testing : - Unit testing is breaking your code into simple parts (units), and these parts are then tested
- Widget Testing :- Widget tests do exactly what they imply: test widgets
- Integration Testing :- An integration test checks a complete app or large part of the app
Let’s Start Writing Our First Script!!!!!
Steps to follow;
-
Need to install the flutter SDK. Go to this link and install the latest flutter SDK https://flutter.dev/docs/get-started/install/windows The documentation in this link explain everything that you need to follow. Please read it. Make sure update the environment variables as mentioned in this document
-
Open the VS code editor and create a new flutter project
-
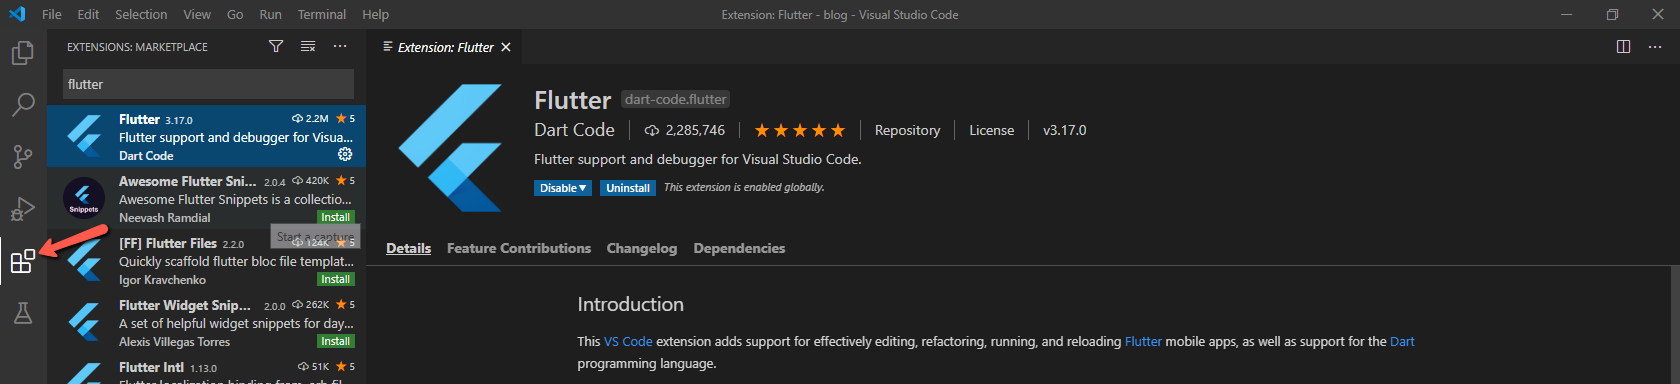
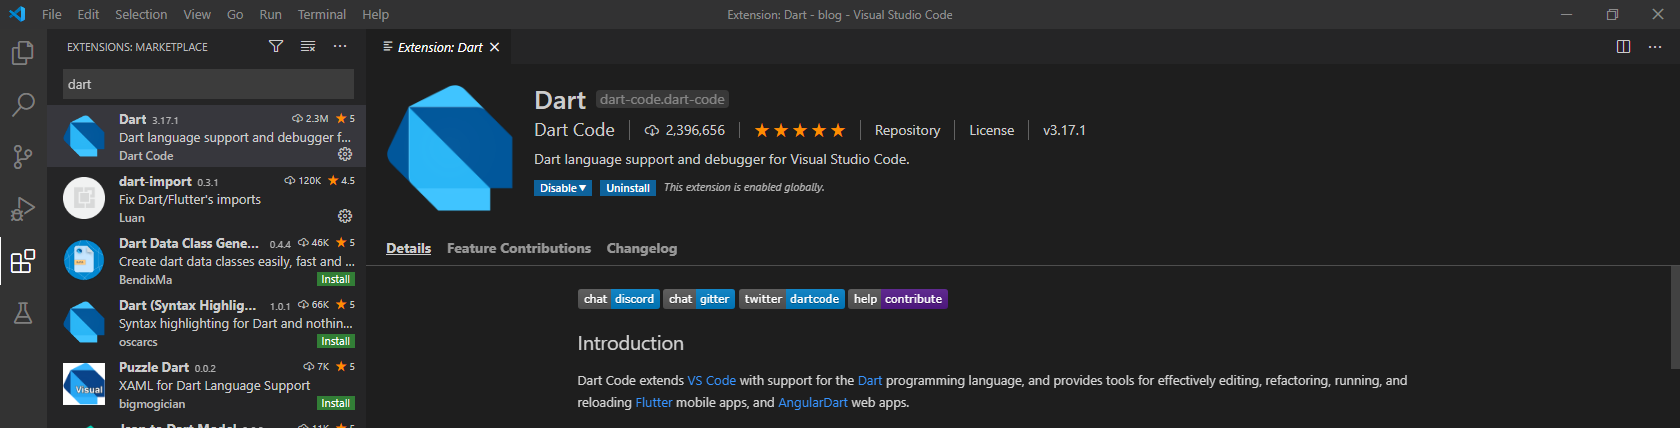
Once you have created the flutter project, go the extension and install “Flutter and DART”
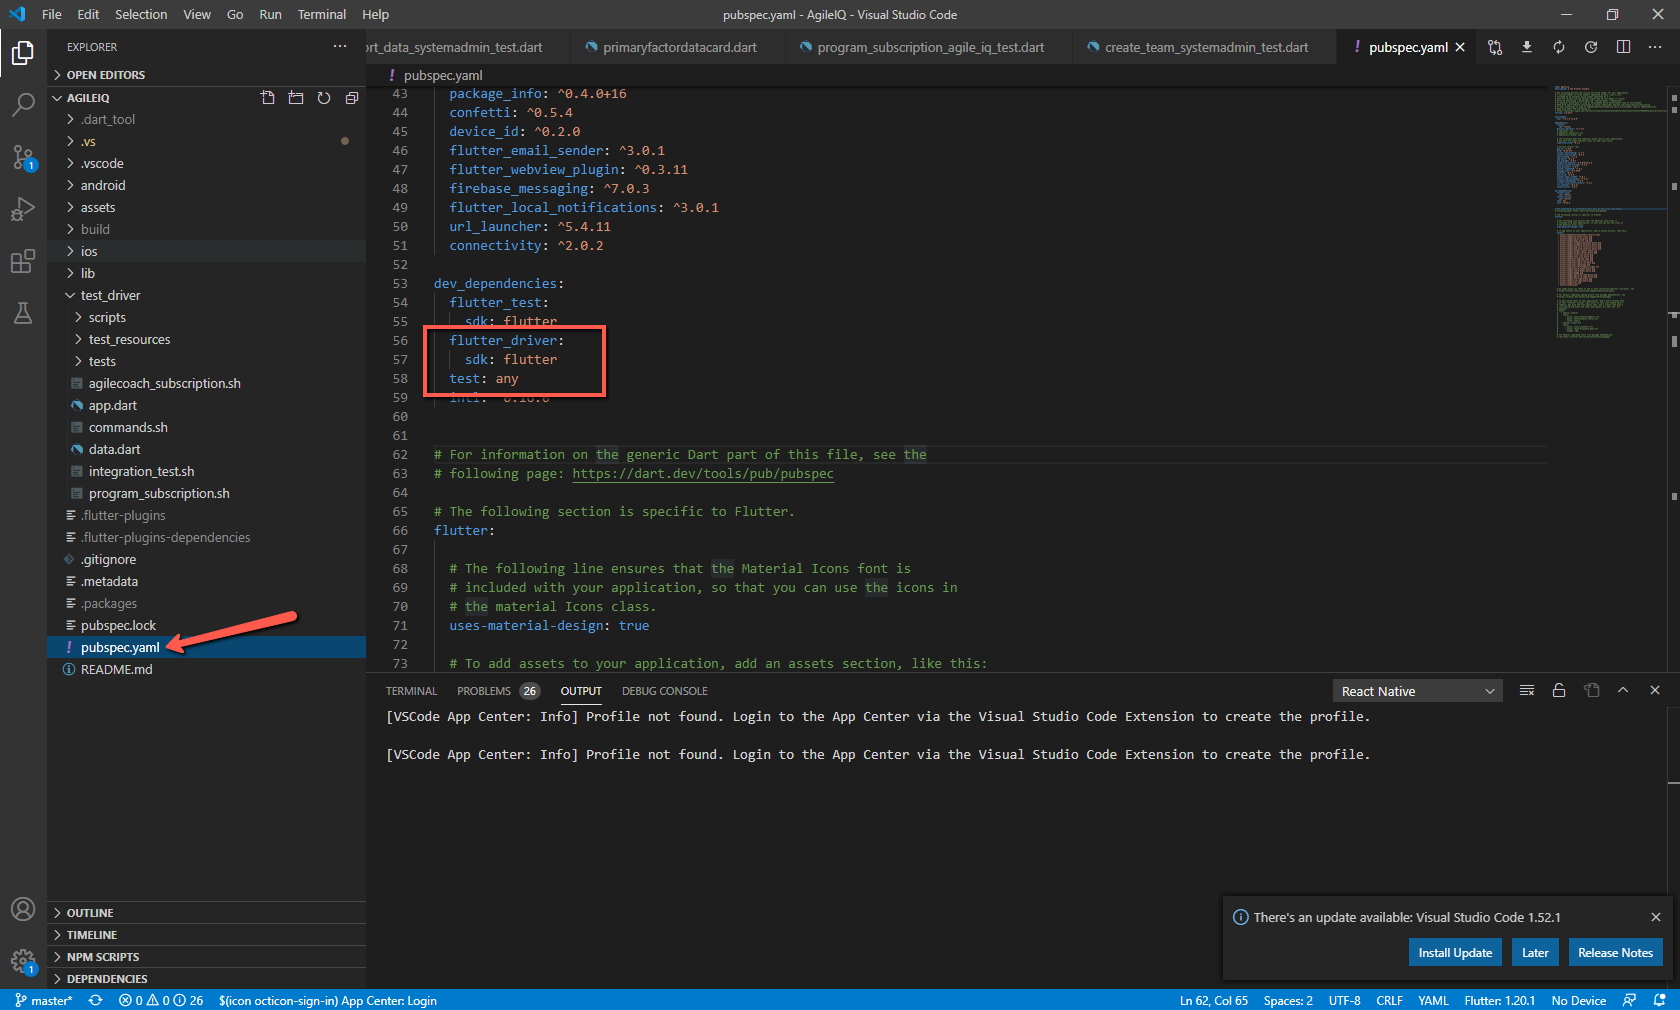
- Add the flutter_driver dependency to pubsec.yaml file flutter_driver: sdk: flutter test: any
-
Once you add this, flutter pub gets command will automatically runs to install all the flutter packages to your project
-
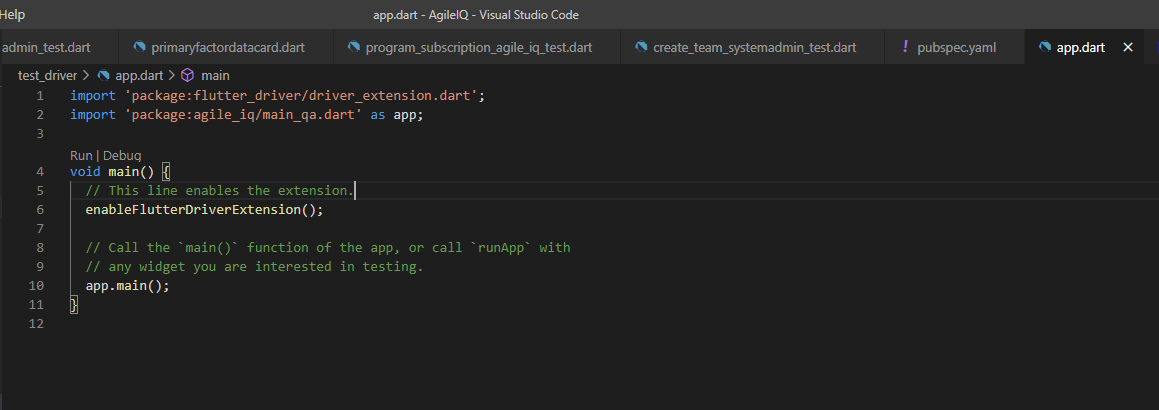
Create the test files. You need two files. One is app.dart and a test file (app_test.dart). App.dart file helps to instrument the app and enable the flutter driver extension and calls the main functions of the app
- Then write your tests in the test folder
// Imports the Flutter Driver API.
import 'dart:io';

import 'package:flutter_driver/flutter_driver.dart';
import 'package:test/test.dart';

void main() {
  group('Flutter Driver demo', () {
    FlutterDriver driver;

// Connect to the Flutter driver before running any tests.
    setUpAll(() async {
      driver = await FlutterDriver.connect();
    });

// Close the connection to the driver after the tests have completed.
    tearDownAll(() async {
      if (driver != null) {
        await driver.close();
      }
    });

    test('Flutter drive methods demo', () async {
      await driver.tap(find.byValueKey('inputKeyString'));
      await driver.enterText('Hello !');
      await new Future.delayed(const Duration(seconds : 5));
      await driver.waitFor(find.text('Hello !'));
      await driver.enterText('World');
      await new Future.delayed(const Duration(seconds : 5));
      print('World');
      await driver.tap(find.byValueKey('button'));
      print('Button clicked');
      await driver.waitFor(find.byValueKey('ScrollUntillHere'));
      await driver.scrollIntoView(find.byValueKey('ScrollUntillHere'));
      await driver.waitFor(find.text('Scroll till here'));
      print('I found you buddy !');
    });
  });
}
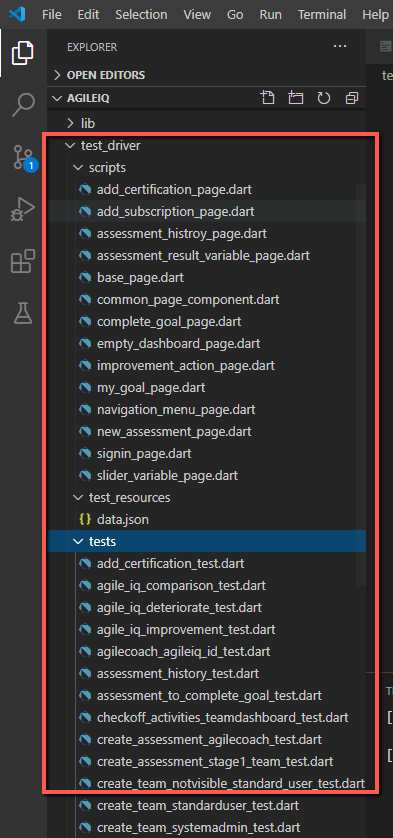
- Project folder structure
-
Under the test_driver folder we write all our test scripts. There are three sub folders as scripts, test_resources and tests. Under scripts we write all the common methods and the keys that we are going to use in our tests. Test_resource folder helps to store the all data values that we need to use in our tests. Test folder contains the tests.
- Finally run the test.
We can use two commands to run the test;
- flutter drive –target=test_driver/app.dart –driver=test_driver/app_test.dart
- flutter drive –no-build –target=test_driver/app.dart –driver=test_driver/app_test.dart
--no-buildcommand helps to run the test without building the app from the scratch while the other commands runs the app by building the app from the beginning.
Limitations
- Flutter UI tests take a lot of time to execute.
- Flutter UI tests aren’t supported by any real device testing providers
- Flutter UI testing requires knowledge of Dart
- No proper way to debug the code
- No reporting feature
- Less documentation for testing
- Some flutter driver methods are not supported by some widgets Ex: - getText() method is not supported in RichText, CustomPaint widgets